
Setting Up a Docker MacVLAN Network for Traefik Visitor Access Log Web Analytics in Promtail/Loki/Grafana for Dashboard Visualization: A Comprehensive Guide
I am working to pass the source IPs coming in to the containers in docker. I do not want to use host, and as far as I understand this is not possible in bridge mode. It is possible with a MacVLAN.
This intro
This tutorial is written to first introduce you to a MacVLAN on a bridged docker network.
Then setup a docker MacVLAN network off the bridge, exclusive to traefik. Traefik will recieve un-forwarded, non-NAT packets, without any host interfearance or extra headers applied.
Then we want to have Promtail pickup the access logs, forward to Loki, and have Grafana setup a dashboard.
Required Software
You will need Debian 12.
Install Script
The only requirement is Debian 12.
The rest of the script covers all materials needed to have:
MacVLAN on the host interface
Docker MacVLAN for Traefik
Traefik’s access logs with original source headers
Analytic dashboard with Promtail/Loki/Grafana
System Requirements
Make sure this is a Debian 12 system you’re working with. I dont think I have mentioned this at all?
Debian 12 only
Oh look there, yes, Debian 12. You may find a path to do this with other methods, but out of the box LXC or VM - we’re going with Debian.
Script Features
Automated Traefik + MacVLAN Setup: Configures Traefik with a MacVLAN Docker network for simplified reverse proxy.
Docker Installation (Optional): Installs Docker if not already present on the system.
Automatic Network Information: Detects and stores host network details (IP, gateway, subnet).
Systemd-Networkd Integration: Generates and applies systemd network configuration files for MacVLAN support.
ifupdown networking disable: Disables ifupdown2 networking if systemd-networkd is enabled.
Context-Aware Configuration: Adapts its configuration steps based on whether it is running before or after a system reboot, ensuring proper setup in either scenario.
LXC virtualization check: Will alter the script depending on the virtual environment.
Dynamic IP Assignment: Automatically assigns an IP address to the Traefik MacVLAN for access.
Docker Network Management: Creates
traefik_proxy_netfor Docker container communication andtraefik2hostfor Traefik’s personal MacVLAN.Configuration File Management: Verifies, downloads, and sets up necessary configuration files for Traefik, Promtail, and Grafana.
Docker Compose Deployment: Deploys the entire Traefik stack using Docker Compose.
Informational Output: Provides post-configuration instructions, including DNS record setup and application access URLs, to guide the user.
MacVLAN WARNING!!
::Information about MacVLAN:: All ports are exposed by MacVLAN. This is fine when Traefik is only serving
80and443, but this setup includes port8080. Additionally, you may want to secure your Traefik metric endpoints, like,/metricsor/statswith an ipWhitelist.
Setup with Install Script
To run a demo setup and see it in action, right now – run the script:
1
2
3

mkdir Traefik-MacVLAN-main && cd ./Traefik-MacVLAN-main && wget https://raw.githubusercontent.com/MarcusHoltz/Traefik-MacVLAN/refs/heads/main/traefik_macvlan_setup_script.sh && chmod +x ./traefik_macvlan_setup_script.sh && ./traefik_macvlan_setup_script.sh
Demo
Tutorial Index
Pre-Setup
This is the setup before the setup. This section is here to make sure you’re able to get started.
What is a MacVLAN?
A MacVLAN provides a direct connection to the physical interface.
The MacVLAN attaches container network interfaces directly to the physical host’s network interface, bypassing the Linux kernel bridge entirely. This means traffic flows directly between the container and the physical network without being routed through a bridge. In traditional Docker bridge networks, traffic is routed through a virtual bridge (e.g., docker0), which involves additional kernel-level processing and often requires NAT for external communication.
But, in this case, a MacVLAN provides direct access to the physical network, allowing a container to have it’s own MAC addresses on the network. This method is best for scenarios where containers need to appear as physical devices on the same network as the host.
A single parent interface (e.g., eth0) can only be attached to one MacVLAN network at a time. This ensures that traffic from different MacVLAN networks is isolated at the physical interface level. By default, containers on a MacVLAN network cannot communicate with the host because they are isolated at Layer 2.
For more advanced setups, VLAN tagging (802.1Q) can be used to further isolate traffic by assigning different VLAN IDs to different MacVLAN networks
Tutorial Requirements
The only requirement stated at the begining of this tutorial is Debian 12. The rest of the tutorial covers all materials needed to have a host to docker MacVLAN network for traefik’s access log, generating analytics with Promtail/Loki/Grafana.
System Requirements
Make sure this is a Debian 12 system you’re working with. I dont think I have mentioned this at all?
Debian 12 only
Oh look there, yes, Debian 12. You may find a path to do this with other methods, but out of the box LXC or VM - we’re going with Debian.
Docker Install Process
This tutorial focuses on installing docker-ce, with a step-by-step install process, and finally creating backwards compatability with older docker-compose command.
Docker Install Steps
Let’s do this:
1
sudo apt update
1
sudo apt upgrade -y
1
sudo apt install apt-transport-https ca-certificates curl software-properties-common
1
curl -fsSL https://download.docker.com/linux/debian/gpg | sudo gpg --dearmor -o /usr/share/keyrings/docker-archive-keyring.gpg
1
echo "deb [arch=$(dpkg --print-architecture) signed-by=/usr/share/keyrings/docker-archive-keyring.gpg] https://download.docker.com/linux/debian $(lsb_release -cs) stable" | sudo tee /etc/apt/sources.list.d/docker.list > /dev/null
1
sudo apt update
1
sudo apt install docker-ce
1
sudo systemctl status docker
1
sudo usermod -aG docker $USER
1
groups $USER | grep docker
Add a reference to old docker-compose commands
The Docker plugin for compose is now opted over the compose binary. This adds an alias so, when you type docker-compose is uses the plugin:
1
2
3

echo -e "\n\n# Docker plugin is now opted over compose binary, now, when you type docker-compose is uses the plugin\nalias docker-compose='docker compose'" >> ~/.bashrc
Great! If you got that done, made it this far, and nothing is on fire - consider your life and entire existance a success.
Network Assumptions
There are going to be some changes that need made to the configuration as it is presented in this tutorial. These defaults are subject to change.
This tutorial uses some defaults that you may need to change.
Subnet size
This area will describe how I have my setup, again, yours may differ.
Presumably, you’d replace every
/19with a/24for the overall network available to communicate over.Then you’d change the Docker subnet from a
/24to a/30to limit the amount of IP addresses available over that network.- If you did change the Docker subnet, you must be sure to change the address of Traefik on the MacVLAN network.
IP Addresses
- Currently the subnet I have set for my DMZ is:
172.21.192.0/19
You may need to change this to fit your own network. What size network do you have? Is it all one subnet, do you have logical subnet segreation?
- The IP Range for the MacVLAN subnet to communicate over:
172.21.192.0/24
How big of a range of IPs do you think are going to be using this network? Please be sure it includes the gateway for the network.
- Gateway address for the MacVLAN subnet:
172.21.192.254
If you change subnet size, be sure that it exists within the Gateway address
- The IP address of the Docker Host:
172.21.192.5
This address is the IP address that DHCP on the host might aquire, we’re setting a reservation or a static address.
- The IP address of the MacVLAN interface for the Docker Host:
172.21.192.100
This is the IP address that will accept connections for Traefik. You will set your DNS to this IP Address.
- The IP address of the temporary bridge we create:
172.21.192.10
This is only for demonstration. It will not be used in the final version at the end.
Network Address Reference Table
IP Addresses Used
| Gateway address for the MacVLAN subnet | IP address of the temporary bridge | IP address of the MacVLAN interface for the Docker Host | IP address of the Docker Host |
|---|---|---|---|
172.21.192.254 | 172.21.192.10 | 172.21.192.100 | 172.21.192.5 |
Subnets Used
| Full Subnet on Network | MacVLAN Bridged Subnet |
|---|---|
| 172.21.192.0/19 | 172.21.192.0/24 |
| 172.21.192.0 | 172.21.192.0 |
| 172.21.223.255 | 172.21.192.255 |
Getting the Correct Domain Name DNS Resolved
You will need a domain name for this to work. It doesnt have to be real, but it has to resolve.
This tutorial’s example is:
1
.noweb.myneatodomain.com
Your own domain!!?
Well, you will need to search and replace text - with the domain you may have set-up:
- ‘noweb.myneatodomain.com’
Option a: Change your DNS on PiHole
If you already have PiHole set up as your primary DNS resolver (to block ads,etc) You can always just add a DNS entry to PiHole and this should resolve correctly.
Option b: Change your DNS on Unbound
Unbound DNS is a fantastic resolver. You can always add a wildcard host domain override. Just like PiHole, anyone using the Unbound DNS server should resolve correctly.
Option c: Change your DNS for a domain purchased with your Registrar
You can always have your public domain point to a private IP address. It will resolve fine, sometimes we must do this if you cannot control the DNS server.
Option d: Change your DNS on The Local Machine
If you just want to modify the DNS for you and not everyone on the network, you can change your hosts file:
- Add entries to your hosts file, open your hosts file:
1
2
3
4

sudo nano /etc/hosts
- Add the following lines
1
2
3

172.21.192.100 whoami1.noweb.myneatodomain.com whoami2.noweb.myneatodomain.com traefik.noweb.myneatodomain.com
- Restart the service:
sudo systemctl restart systemd-hostnamed
First Test - a Docker MacVLAN Network
Setting up a quick test of the Docker MacVLAN Network.
Step 1: Check Network Interface
First, identify the network interface you’ll use as the parent for the MacVLAN network:
1
2
3

ip addr show
Let’s assume your interface is ens18 with IP 172.21.192.5.
Step 2: Create MacVLAN Network
Here is the MacVLAN setup from my Debian docker host. It creates me a /24 network range I can use for docker containers on my local DMZ subnet, a /19 network:
1
2
3

docker network create -d macvlan --subnet=172.21.192.0/19 --ip-range=172.21.192.0/24 --gateway=172.21.192.254 -o parent=ens18 test_macvlan
Step 3: Test the New Network
Now, let’s quickly run a whoami container on this network:
1
2
3

docker run -d --name whoami --network test_macvlan --ip 172.21.192.100 traefik/whoami
Step 3a : Test Container Connectivity
See Test if the container is reachable from another machine on your network, anything other than the docker host:
1
2
3

curl http://172.21.192.100
Step 4: Enable Host-to-Container Communication
We have to make ip tables changes to make this work, DONT WORRY. These are temporary and will revert back with any reboot.
To allow the Docker host to communicate with the container:
1
2
3
4
5
6

sudo ip link add test_macvlan link ens18 type macvlan mode bridge
sudo ip addr add 172.21.192.10/32 dev test_macvlan
sudo ip link set test_macvlan up
sudo ip route add 172.21.192.100/30 dev test_macvlan
Step 5: Test the New Network Connection
Now you have to test from the docker host, where you just typed in all the commands above:
1
2
3

curl http://172.21.192.100
1
2
3
4
5
_________________
|  Bingo Bango  |
!!!!!!!!!!!!!!!!!
Mission  Complete
Why did this work?
A MacVLAN interface allows you to assign multiple MAC addresses to a single physical network interface, essentially creating isolated virtual network interfaces on top of your host’s physical interface. Each container or virtual machine can have its own MAC address and appear as a separate device on the network, even though they share the same physical network interface on the host.
In this case, the MacVLAN interface (e.g., test_macvlan) will act as the bridge between the containers/VMs and the host, and you’ll need to adjust your iptables rules to account for both the MacVLAN interface and the host interface (like ens18).
Second Test - Setting Up with Docker-Compose to Test a Docker MacVLAN Network
In this example, we’re setting up a docker-compose file for a more complex setup, we’re doubling the docker containers.
Step 1: Docker Compose File
Open a new file and name it: docker-compose.yml
- Paste in the following:
1
2
3
4
5
6
7
8
9
10
11
12
13
14
15
16
17
18

services:
  whoami1:
    image: traefik/whoami
    networks:
      test_macvlan:
        ipv4_address: 172.21.192.101

  whoami2:
    image: traefik/whoami
    networks:
      test_macvlan:
        ipv4_address: 172.21.192.102

networks:
  test_macvlan:
    external: true
Save your file and return to the command line.
Step 2: Run docker-compose
1
2
3

docker-compose up -d
Step 3: Time for Testing the Compose Setup
Test both containers, from the docker host or from another machine on the same network:
1
2
3
4

curl http://172.21.192.101
curl http://172.21.192.102
Great! They all work! We included all these IP Adresses when we made our route to test_MacVLAN.
Step 4: Cleanup Running Docker Containers
You may want to remove everything running, this was just to demonstrate starting everything up together:
- Shut down and remove your current containers:
1
2
3

docker stop $(docker ps -a -q) && docker rm $(docker ps -a -q)
Final Test - Setting Up Host bridged Docker MacVLAN Network for Traefik
Building on the previous example, let’s integrate Traefik as a reverse proxy for our services using MacVLAN and additional required networks.
Assumptions about your setup
I’m going to assume you removed all the containers, deleted your docker-container.yml, kept the MacVLAN and ip tables rules we made earlier. Starting from scratch - but same network.
Step 1. Create a new internal docker network
With this, any containers placed here can access each other without the host:
1
2
3

docker network create traefik_proxy_net
Step 2: Create Docker Compose File
Create a docker-compose.yml file with the following content:
1
2
3
4
5
6
7
8
9
10
11
12
13
14
15
16
17
18
19
20
21
22
23
24
25
26
27
28
29
30
31
32
33
34
35
36
37
38
39
40
41
42
43
44

services:
  traefik:
    image: traefik:v2.9
    container_name: traefik
    command:
      - "--api.insecure=true"
      - "--providers.docker=true"
      - "--providers.docker.exposedbydefault=false"
      - "--entrypoints.web.address=:80"
    ports:
      - "80:80"
      - "8080:8080"
    volumes:
      - /var/run/docker.sock:/var/run/docker.sock:ro
    networks:
      test_macvlan:
        ipv4_address: 172.21.192.100
      traefik_proxy_net:

  whoami1:
    image: traefik/whoami
    labels:
      - "traefik.enable=true"
      - "traefik.http.routers.whoami1.rule=Host(`whoami1.noweb.myneatodomain.com`)"
      - "traefik.http.routers.whoami1.entrypoints=web"
    networks:
      - traefik_proxy_net

  whoami2:
    image: traefik/whoami
    labels:
      - "traefik.enable=true"
      - "traefik.http.routers.whoami2.rule=Host(`whoami2.noweb.myneatodomain.com`)"
      - "traefik.http.routers.whoami2.entrypoints=web"
    networks:
      - traefik_proxy_net

networks:
  test_macvlan:
    external: true
  traefik_proxy_net:
    external: true
Step 3: Run Docker Compose
Start the services:
1
2
3

docker-compose up -d
Step 4: Test the Setup
Remember, this will only work if you have DNS set up correctly.
Now test the services:
1
2
3
4

curl http://whoami1.noweb.myneatodomain.com
curl http://whoami2.noweb.myneatodomain.com
You should see responses from the whoami containers, routed through Traefik.
Step 5: For Funsies Access Traefik Dashboard
Open a web browser and navigate to http://172.21.192.100:8080 to access the Traefik dashboard. Or you could try: http://traefik.noweb.myneatodomain.com:8080
This setup uses MacVLAN to give Traefik a real IP on your network, allowing it to bind to port 80. The traefik_proxy_net network enables communication between Traefik and the other containers. Traefik acts as a reverse proxy, routing requests to the appropriate whoami service based on the hostname.
Remove all work previous to this section
That was a good example of a MacVLAN and Docker’s bridge. But for the rest of this tutorial we’ll be completing a manual version of what that script at the begining did.
If you just want to run the script, and not have to mess with anything else - be sure to first clear out any work previously done.
Remove hosts file
Be sure to remove any host file entries you may have made.
1
2
3
4

sudo nano /etc/hosts
Remove the test bridge and route
You only need the bridge on the host if you expect the host to be able to talk to the MacVLAN interface, as everything available from the hosts IP 172.21.192.5, will be available to the rest of the network under the bridged address as well, 172.21.192.10.
Delete the IP route:
sudo ip route del 172.21.192.100/30 dev test_macvlanBring the test_macvlan interface down:
Warning:
Sometimes this will take down your entire network. Watch out if on ssh. Most of the time I like to throw a restart command in there, just incase. Or you can just reboot the machine
sudo ip link set test_macvlan down; sleep 2; sudo systemctl restart networking.servicesudo ip link set test_macvlan down; sudo reboot
Delete the IP address:
sudo ip addr del 172.21.192.10/32 dev test_macvlanDelete the test_macvlan interface:
sudo ip link delete test_macvlanRemove the docker MacVLAN network:
docker network rm test_macvlanRemove the docker internal bridge network:
docker network rm traefik_proxy_netVerify removal of networking:
ip route listEnsure all docker networks are back to original:
docker network ls
If you are still having any trouble, head over to the Troubleshooting section.
New Docker
You should also start fresh with docker and everything on it.
1
2
3

printf "Stopping all running containers\n"; docker stop $(docker ps -a -q) && printf "Removing all docker containers\n"; docker rm $(docker ps -a -q) && printf "Removing all docker images\n"; docker rmi -f $(docker images -a -q) && printf "Removing all docker networks (except the default ones)"; docker network prune -f && printf "Removing all docker volumes"; docker volume prune -f && printf "Clearing the docker build cache\n"; docker builder prune -f && prinf "Comprehensive cleanup starting (removes everything including unused volumes)"; docker system prune --all --volumes --force && echo "######DOCKER######"; sleep .5; echo "##   W I P E D  ##";
Reboot
Might be a good time to reboot now.
Traefik, Docker-Compose, and a MacVLAN network
This next section is less test more production. Be warned there’s a lot more steps.
If you would like, there is an scripted version of this process available. Use the Github link to check the repo out.
It will handle all the networking and ip configuration for you.
I took the directions below, converted them - Now they’re in the traefik_macvlan_setup_script.sh.
If you would still like to follow along, this section of the tutorial is a step-by-step install of the MacVLAN docker network setup with Traefik.
If you are strong of heart and will of mind, you may proceed.
A few network related changes
The IP Addresses are changing for this section of the tutorial. Please be aware of the differences so you can make the appropreate changes to your setup.
We’re strictly using MacVLAN, without a bridge. This mode is useful when you want strict isolation between virtual interfaces while still allowing external communication.
- The IP Adress of the Docker Host is:
172.21.192.250
- The IP Address of Traefik on Docker’s MacVLAN is:
172.21.192.251
- The name of the MacVLAN on the Host is called:
traefik2docker
- The name of the Docker Network using the MacVLAN is:
traefik2host
Modifications required
Unlike the script, that will do this setup for you, I didnt set up the following with environment variables.
You will have to search and replace.
Docker-Compose
Most of this tutorial is created from scratch to help you get a better understanding, but, the docker-compose aspect of traefik’s access logs is out of scope for this tutorial.
If you would like to know more, I can suggest checking out Oli Zimpasser’s Github and Medium article, linked below.
oglimmer does a fantastic job explaining this.
Copy my repository from Github
Now to begin this section of the tutorial – instead of making this from scratch, I am asking you to copy the reqired materials from MarcusHoltz Github.
- Clone the Traefik-MacVLAN Github Repository.
Be sure you are in a folder you have write access to. This command will download and extract to: ./Traefik-MacVLAN-main
1
2
3

wget -O temp.zip https://github.com/MarcusHoltz/Traefik-MacVLAN/archive/refs/heads/main.zip && unzip temp.zip && rm temp.zip
What did you just copy?
1
2
3
4
5
6
7
8
9
10
11
12
13
14
15
16
17
18
19
20
21
22
.
|-- README.md
|-- docker-compose.yml
|-- etc
|   `-- systemd
|       `-- network
|           |-- 20-ens18.network
|           `-- 25-traefik2docker.netdev
|-- grafana
|   `-- provisioning
|       |-- dashboards
|       |   |-- Webanalytics.json
|       |   `-- dashboard.yaml
|       `-- datasources
|           `-- ds.yaml
|-- promtail
|   `-- promtail-config.yml
|-- traefik
|   `-- traefik.yml
`-- traefik_macvlan_setup_script.sh

10 directories, 10 files
10 Directories and 10 Files
Let’s first go over the ./ base of the downloads directory.
Files in the base of the Github repo
This repo has a lot to get into, let’s first take a look at the files available to us once we enter the repository ( ./Traefik-MacVLAN-main).
1
2
3
4
5
6
.
|-- README.md
|-- docker-compose.yml
`-- traefik_macvlan_setup_script.sh

0 directories, 3 files
This section consists of three files:
README.md
This file is specific to the Github repo, and unused in this configuration.
traefik_macvlan_setup_script.sh
The script that will complete the manual process we’re doing right now. Run it, and quit reading.
docker-compose.yml
This file will complete our Docker stack. It will download the images needed, spin up the containers, and assign volume and network information to them. You will need to modify this to assign an IP Address to Traefik and assgin your DNS to the containers. RUNNING THIS IS THE LAST STEP.
Folders you dont need to touch in the Github repo
This section excludes the ./etc folder. It is for a special purpose, explained later.
1
2
3
4
5
6
7
8
9
10
11
12
13
14
.
|-- promtail
|   `-- promtail-config.yml
|-- traefik
|   `-- traefik.yml
|-- grafana
|   `-- provisioning
|       |-- dashboards
|       |   |-- Webanalytics.json
|       |   `-- dashboard.yaml
|       `-- datasources
|           `-- ds.yaml

6 directories, 5 files
This section of the repository consits of several directories, each containing configuration for each service, view but dont touch:
grafanapromtailtraefik
No changes need to be made inside of those folders.
You didnt copy enough, you need more to copy
Oh well, looks like I lied. You do need to make a change in one of those folders. You need to:
You must copy the file:
GeoLite2-City.mmdbFrom this location: maxmind.com
To this path
./promtail/
As explained below:
Geo location lookup
Promtail will throw an error in the config if you dont do exactly as described:
Go to https://dev.maxmind.com/geoip/geolite2-free-geolocation-data and download GeoLite2-City.mmdb. Place it into the promtail directory.
Dont complain to me when promtail wont start because you forgot to do this step.
Modifications needed in the ./etc folder of the Github repo
1
2
3
4
5
6
7
8
.
|-- etc
    └── systemd
        └── network
            ├── 20-ens18.network
            └── 25-traefik2docker.netdev

3 directories, 2 files
This folder is an example of your root folder structure. I have provided a few files, to generate the new MacVLAN interface.
- You copied a lot of directories over, but the only one we’re going to pay attention to is the
./etcfolder.
Change /etc/systemd/network/20-ens18.network
You will need to change the ens18 interface name to what your interface you’re using is.
In the filename:
20-ens18.networkAnd inside the file:
1
2
[Match]
Name=enp0s18
Place the /etc/ files in the correct location
Again, ./etc was a skeleton folder structure for you to find and understand.
Now the files have to go into the correct location. Be sure you are working in the downloaded repo’s directory: ./Traefik-MacVLAN-main
1
2
3

sudo cp -R ./etc/ /
If that was successful, you can now remove the
/etc/folder from your working directory.or you can re-create the required systemd network files from scratch in the next section.
Persistant network configuration
Why all the systemd network files? Why can’t we just do it like the bridge demo earlier?
That’s great how we set up the bridge demo, but none of that will work again if you reboot.
We need to add changes to the correct area for a persistant network.
Dont do this.
This was ok when a 12 oz. glass bottle of Coca-Cola cost about 1.35 U.S. dollars in North America.
In theory, you can use ifup to create the MacVLAN:
This method will create the virtual bridge up after the parent interface comes up, then restart the docker service.
First open the file to edit:
1
2
3

sudo nano /etc/network/interfaces
Then make changes on the last line, under the iface:
1
2
3
4
5
6
7
8
9
10

# The loopback network interface
auto lo
iface lo inet loopback

# The primary network interface
allow-hotplug ens18
iface ens18 inet dhcp
up sleep .5; ip link add traefik2docker link ens18 type MacVLAN mode vepa && ip link set traefik2docker up && sleep 2; systemctl restart docker.service
The reason I have all those ugly sleep delays in there, this is after the interface comes up. If it was pre-up, the interface wouldnt ever come up if there was a problem with this bridge. So it avoid that, I build the bridge after the interface comes up, which means, after the docker service starts.
Order of how this works:
Kernel boots
Network stack comes up
ens18 starts to get an IP
a script that begins with “sleep .5” starts
after the script sleeps for 500ms, it begins to build a MacVLAN
the MacVLAN’s name will be traefik2docker
traefik2docker will be built onto ens18
the MacVLAN’s state is set to up
the docker service is restarted to see this new vepa device
VEPA allows traffic from and to the parent device, but not to other addresses on the same parent device.
Debian’s networking service (ifup) is now finished and fully loaded. This is the process that will happen everytime you reboot or the networking.service is restarted.
This method above is terrible for the following reasons:
Uses the legacy networking configuration in /etc/network/interfaces
Relies on arbitrary sleep delays which may not be reliable
Requires Docker service restart which can disrupt running containers
May not properly handle race conditions during boot sequence
VEPA conducts a hairpin turn for inter-container communication and can cause unneeded network traffic.
Persistant networks with systemd
Systemd-networkd provides a more robust way to create persistent network devices on Debian 12. Here’s how to implement it:
Step 1: Create the MacVLAN device definition
You should already have this file, and you should also have no reason to edit it. This is an example as to why this file is required.
A netdev file is a configuration file used by systemd-networkd to define and manage virtual network devices. Netdev files support various types of virtual network devices, including bond, bridge, dummy, MacVLAN, vlan, and many others.
1
2
3

sudo nano /etc/systemd/network/25-traefik2docker.netdev
Then make sure this is in the file:
1
2
3
4
5
6
7
8

[NetDev]
Name=traefik2docker
Kind=macvlan

[MACVLAN]
Mode=private
What do all of the lines in the netdev file do?
[NetDev]is the header that defines the start of the network device configuration section.Name=traefik2dockerthis is the name of the virtual network device being created.Kind=macvlanthis virtual device is of type MacVLAN. This allows for creating multiple virtual network interfaces with different MAC addresses on a single physical interface.MACAddress=Keep this line equal to nothing. That allows the system will generate a random MAC address for this interface.[MACVLAN]is the header that starts the section for our MacVLAN configuration.Mode=privateWe want only traefik to have access to the host’s larger network. So we’re making this private so any endpoints using this connection, the traffic between them (other docker containers) is dropped. This ensures complete isolation at Layer 2 for all MacVLAN instances on the same physical interface. Conversly,(other option)
Mode=bridgeThis would set the MacVLAN mode to “bridge”. In this mode, all of the traefik endpoints can directly communicate with each other and the external network.(other option)
Mode=vepaTraffic between MacVLAN instances is always sent out to the upstream switch or bridge, even if it’s destined for another MacVLAN on the same parent device, this allows port mirroring on the switch or SPAN on the interface, but also allows for inter-docker communication. However, leaving the interface and coming right back (hairpin) can potentially increase latency and network overhead for inter-container communication on the same host.
Modifications required to /etc/systemd/network/25-traefik2docker.netdev
You dont need to change anything in this file, just be sure it finds it’s home in: /etc/systemd/network/
- With the filename:
25-traefik2docker.netdev
Step 2: Put that MacVLAN on a parent Interface
Create the systemd-networkd configuration file to define our network settings for the interface named in the file, in this example, ens18:
1
2
3

sudo nano /etc/systemd/network/20-ens18.network
Then make sure this is in the file:
1
2
3
4
5
6
7
8
9

[Match]
Name=enp0s18

[Network]
# Note: Each network interface should be managed by only one DHCP client or network manager, so it is advised to run only one DHCP client or network manager on the system.
# Added the MacVLAN as a secondary device
MACVLAN=traefik2docker
What is going on in a systemd networkd network file?
[Match] SectionThe [Match] section in a systemd network file determines whether the configuration in that file should be applied to a specific network interface. It serves as a filter to identify which network devices the configuration should affect.Name=enp0s18This line specifies that this configuration applies to the network interface’s altname, “enp0s18”, this is a more specific name and will allow us to rename the interface later if we need to.MACVLAN=traefik2dockerThis line creates a MacVLAN interface named “traefik2docker” as a secondary device attached to ens18. A MacVLAN allows you to create multiple virtual network interfaces with distinct MAC addresses on a single physical interface.
Modifications required to /etc/systemd/network/20-ens18.network
This is the manual setup, I didnt set these up with an .env file. You will need to modify \etc\systemd\network\20-ens18.network
Again, you will need to change the ens18 interface name to the name of what the interface you’re using is.
In the filename:
20-ens18.networkAnd inside the file:
1
2
[Match]
Name=enp0s18
Step 3: Optional BONUS: Rename the parent interface
If you decide to rename your parent interface, you’re kicking /etc/network/interfaces to the curb and will also need to turn on DHCP for your re-named interface, and grab a new IP.
The interface’s new name below is set as:
proxmoxModify the name, and interface as needed
1
2
3
4
5
6
7
8

MACaddr=$(ip link show ens18 | grep -o -E ..:..:..:..:..:.. | head -n 1) && sudo bash -c "cat <<EOF > /etc/systemd/network/10-interface-rename.link
[Match]
MACAddress=$MACaddr

[Link]
Name=proxmox
EOF" && sed -i '/\[Network\]/a DHCP=yes' /etc/systemd/network/20-ens18.network
Step 4: Enable and restart systemd-networkd and the VM
1
2
3

sudo systemctl enable systemd-networkd
Great. You got it enabled, but if you restart systemd-networkd - to use it, it will flush everything and hang your connection, with no chance to get back. Also, if you get stuck in a hung session… hit ~ then .
So to avoid the reboot and/or hung SSH connection - instead, just
Great time to reboot right about now
1
2
3

sudo systemctl reboot
DO NOT TRY AND RESTART SYSTEMD-NETWORKD UNLESS YOU’RE CONNECTING IN FROM A DAEMON CONNECTED DIRECTLY TO THIS SERVICE.
Dont copy this, hopefully you rebooted.
1
2
3
# DONT DO THIS DONT DO THIS DONT DO THIS DONT DO THIS DONT DO THIS DONT DO THIS
sudo systemctl restart systemd-networkd && sudo systemctl reboot # STOP - DONT
# DONT DO THIS DONT DO THIS DONT DO THIS DONT DO THIS DONT DO THIS DONT DO THIS
Step 4: Marvel at your new MacVLAN sub-interface
Look, there it is. Look at it do nothing.
1
2
3

ip link show traefik2docker
If it works, it will show: traefik2docker@ens18
Docker network creation
Step 1: Create MacVLAN network
Create the Docker MacVLAN network using this new bridge interface:
1
2
3

docker network create -d macvlan --subnet=172.21.192.0/19 --ip-range=172.21.192.240/28 --gateway=172.21.192.254 -o parent=traefik2docker traefik2host
Step 2: Create Docker internal bridge network
Create docker internal bridge network:
1
2
3

docker network create traefik_proxy_net
Step 3: YOLO restart Docker
Restart docker to test:
1
2
3

sudo systemctl restart docker.service
Step 4 (dont do this): Host-Container communication
(Optional) I dont want this, but you may need Host-Container communication (required for Debian Host to talk directly with Docker MacVLAN), or your could aways change from
privateMacVLAN to aVEPAMacVLAN:
1
2
3
4
5
6

   # I would avoid this if you can at all, it's only here for some person who - we all are praying for you - may need this
   sudo ip addr add 172.21.192.252/32 dev traefik2docker   # avoid doing this
   sudo ip route add 172.21.192.240/28 dev traefik2docker    # avoid doing this
   # Dont use this if you dont have to. Avoid even reading this text and move on.
Step 5: Verify Docker network
To verify the Docker network you will need jq installed: sudo apt install jq
This should display, in pretty json – “parent”: traefik2docker”
1
2
3

docker network inspect traefik2host | jq '.[].Options'
Reboot
Might be a good time to reboot now and see what broke.
What happened? What were all those changes good for?
You can SSH into the Docker Host, and will be able to access any exposed ports by docker:
- 172.21.192.250
You will be able to access traefik over the MacVLAN:
- 172.21.192.251
Modifications to docker-compose.yml
The docker-compose file, docker-compose.yml is in the base of the repository.
You will need to edit the docker-compose.yml to match your own personal setup.
Docker-Compose file - editing
- Change your DNS domain name pointing to services
- You will find through this document, noweb.myneatodomain.com, as the sample domain. If TLS certs are not involved, you can set the domain to anything you like as long as the DNS points to the Traefik IP address declaired in the docker-compose file.
So, if you want, search and replace that sample domain with your perfered domain replacing example.com in the command below:
1
2
3

sed -i 's/noweb\.myneatodomain\.com/example.com/g' docker-compose.yml
reminder: Make sure you have your DNS set to the correct IP address, reference Getting the Correct DNS Resolved if you dont have that set up.
- The IP address of traefik on the Host’s bridged interface.
- look for traefik’s service and find the networks section. Change this IP to any that are within your host’s subnet and declaired in your
docker network create -d MacVLANcommand you will run later, in the Docker network creation section.
This is the IP Address you set wit the DNS domain name above, it is address to port forward port 80 to.
1
2
3
    networks:
      traefik2host:
        ipv4_address: 172.21.192.251
Run docker-compose in the base of the Github repo’s directory ./Traefik-MacVLAN-main
Light a candle, rub a coin, and say a prayer.
1
2
3

docker-compose up -d
If all goes well, you will need:
Links to generate website requests
Here are several sites to generate website requests to your new Traefik webanalytics dashboard:
1
2
3
4
5
6
7
8
9
10
11
12
13
- http://traefik.noweb.myneatodomain.com

- http://whoami1.noweb.myneatodomain.com

- http://whoami2.noweb.myneatodomain.com

- http://catapp.noweb.myneatodomain.com

- http://error.noweb.myneatodomain.com

- http://portainer.noweb.myneatodomain.com

- http://anything.noweb.myneatdomain.com
Services not accessible by web:
promtail
loki
Services directly accessibly by IP Adress:
http://172.21.192.251:8080 access Traefik Admin UI
Traefik Analytics Collected
You can view Traefik logs in Grafana:
http://grafana.noweb.myneatodomain.com
Screen Shots !!!
Screen shots of this project are included below:
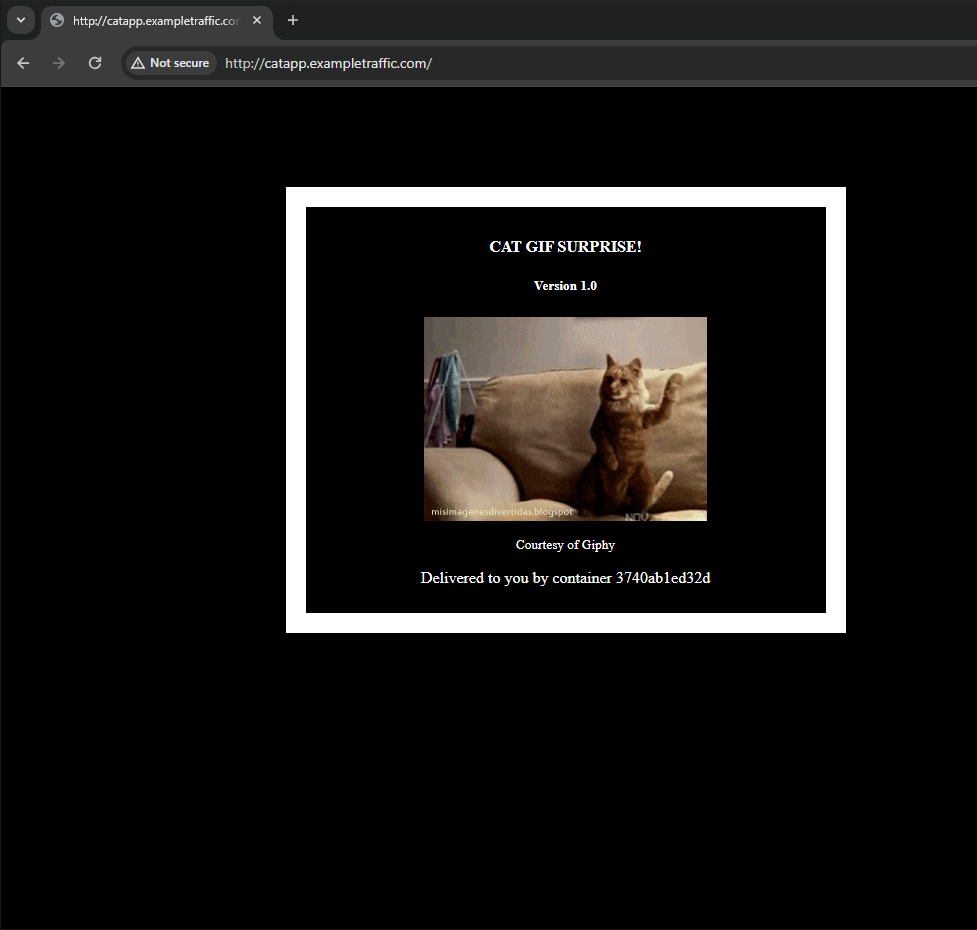
Catapp the ultimate web access log generator.
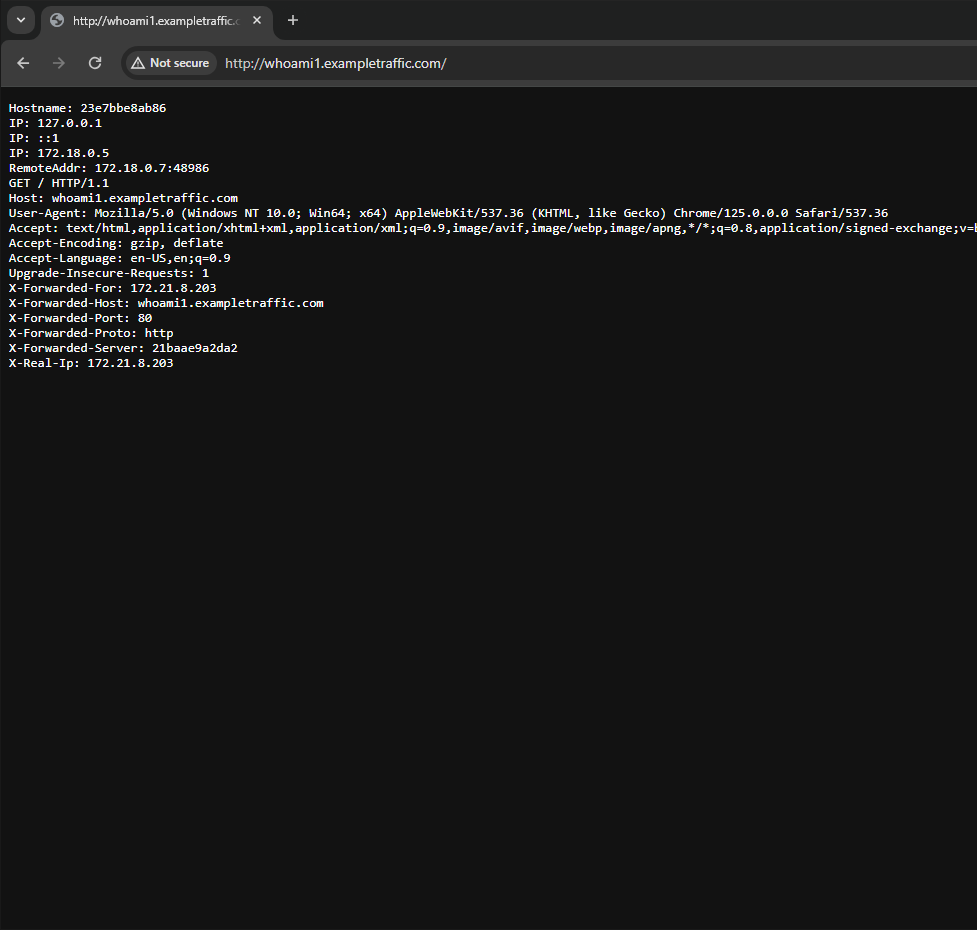
Whoami instance 1. This demonstrates to the client what is going on as the reverse proxy.
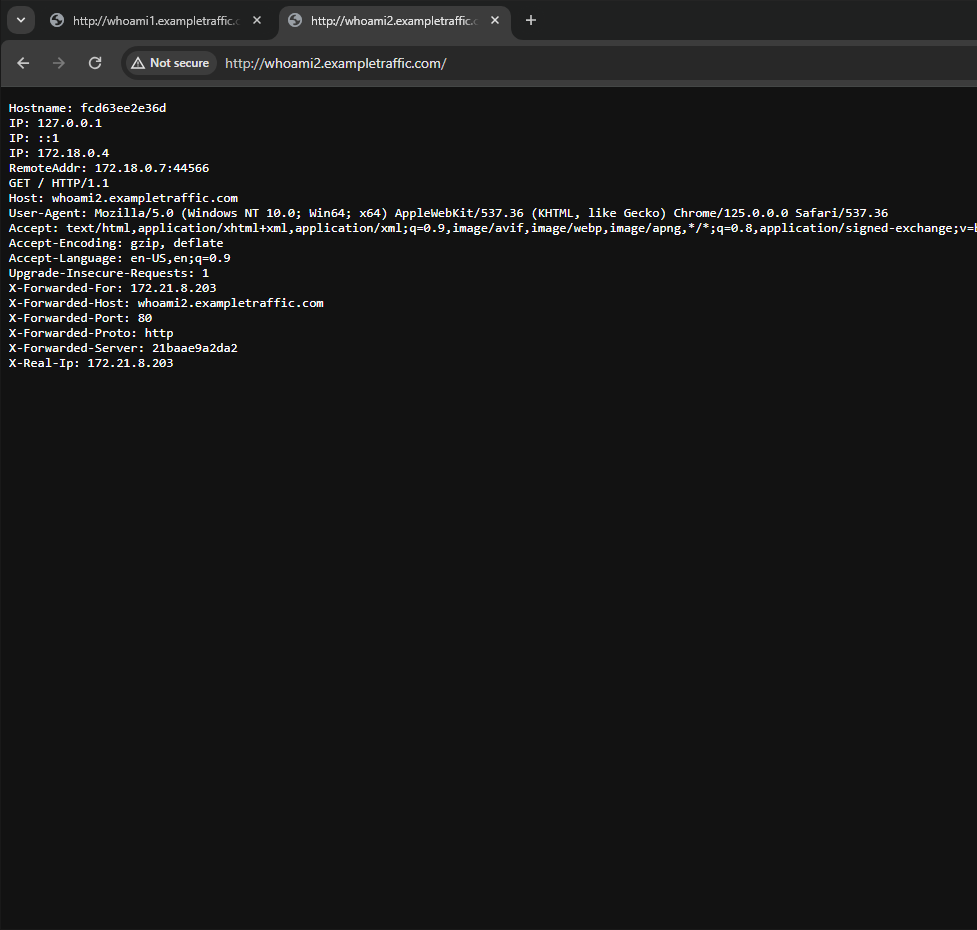
Whoami instance 2. Demonstrating consistancy to the client on what is going on inside the reverse proxy.
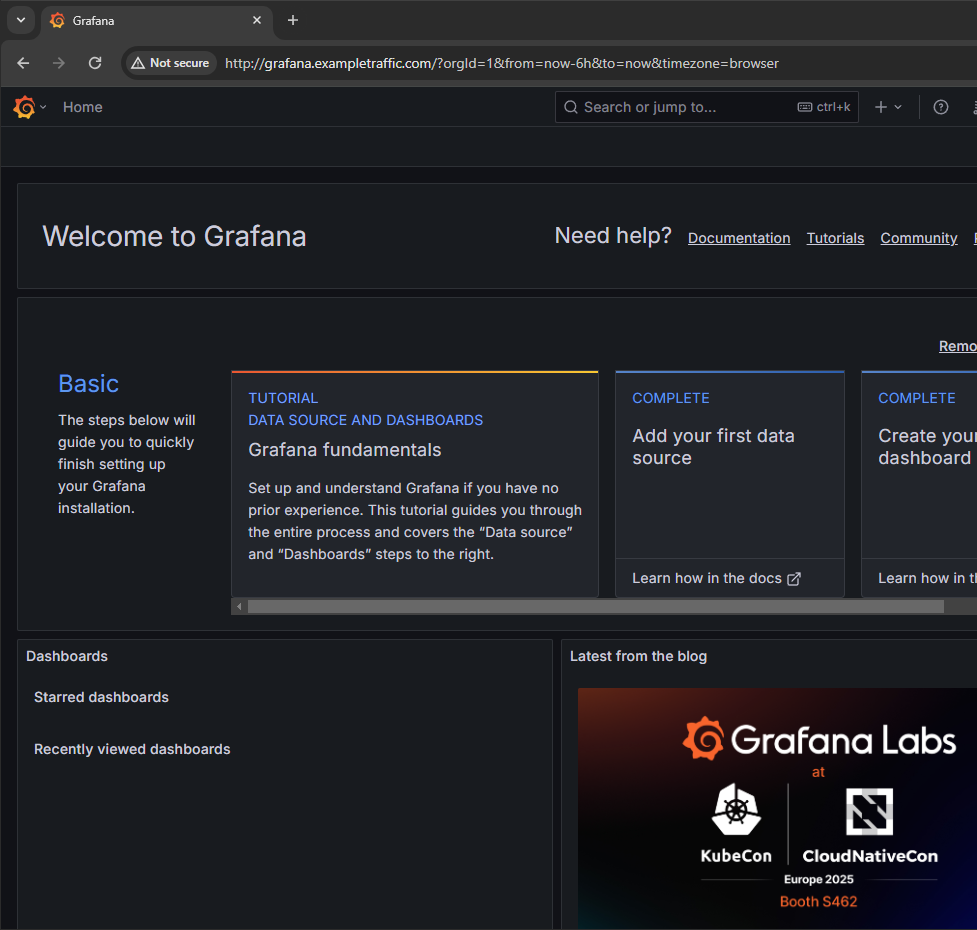
This is the first page you will see when you first load up grafana. The menu is accessible from the top left.
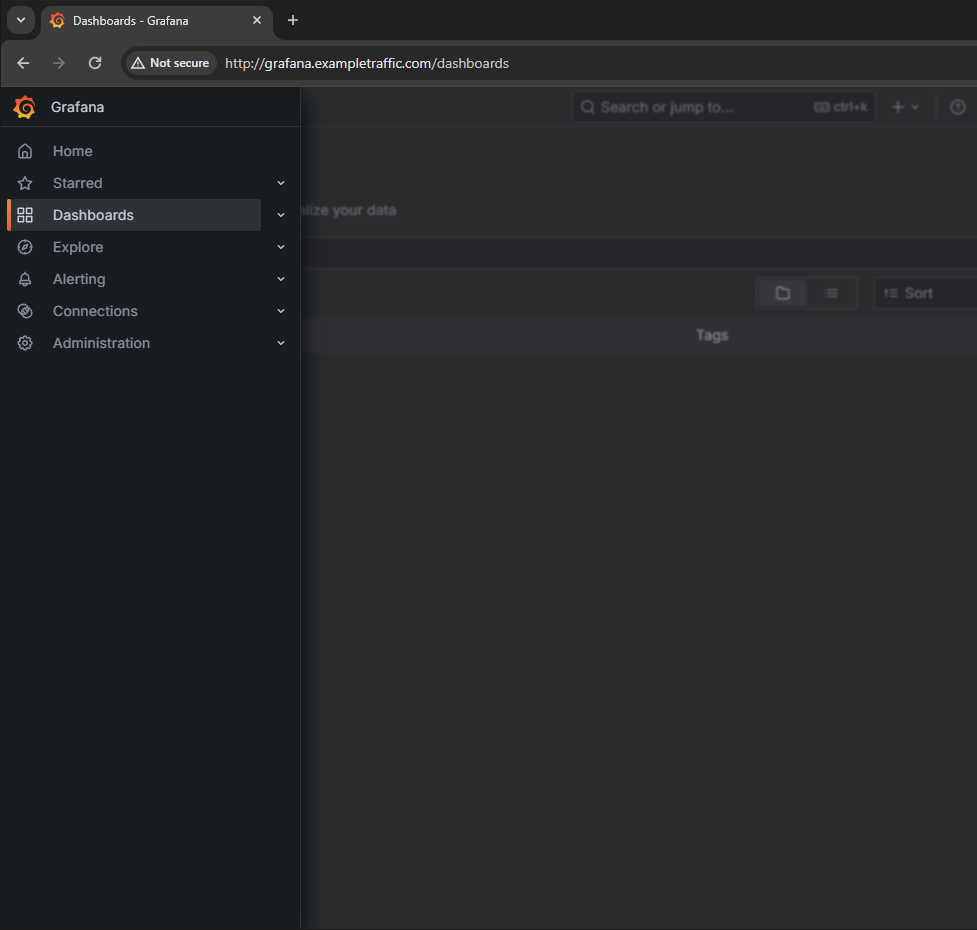
Clicking there will bring up the menu, select ‘Dashboards’ and find the ‘Webanalytics’ dashboard.
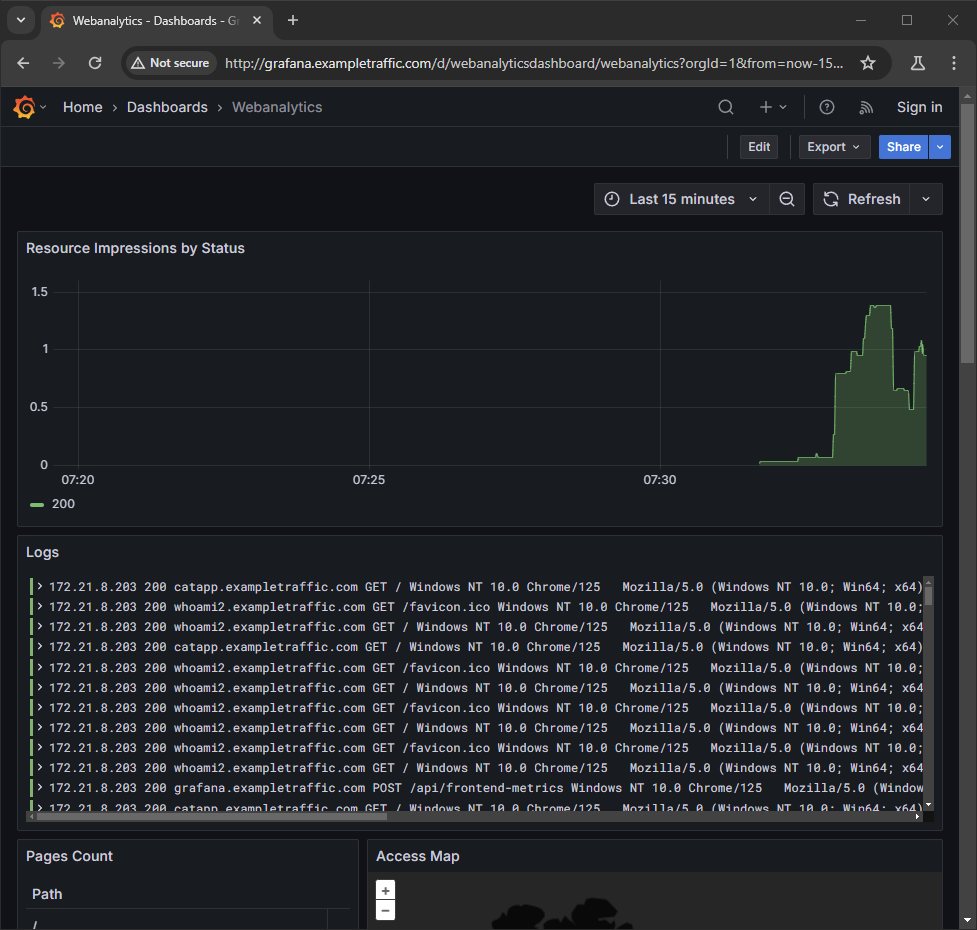
Loading up the Webanalytics dashboard for Grafana, you can see the logs coming in.
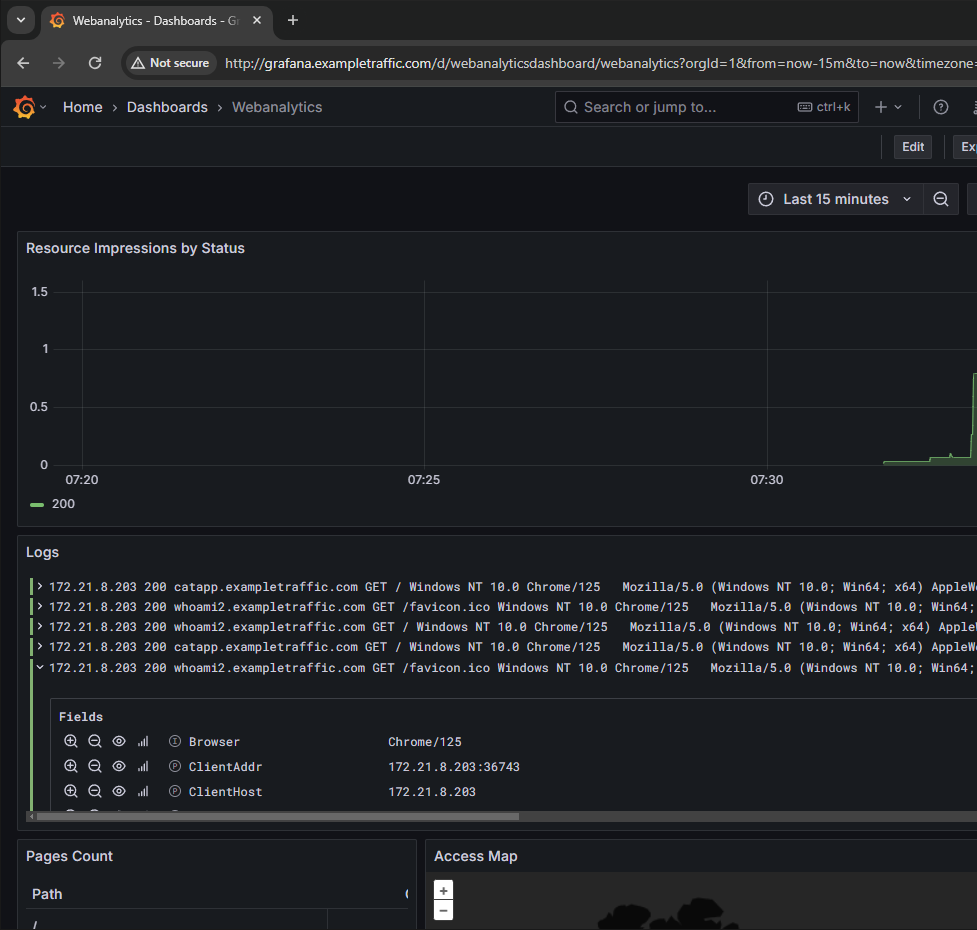
You can drill down into the logs directly inside of Grafana and use them to create more Dashboards.
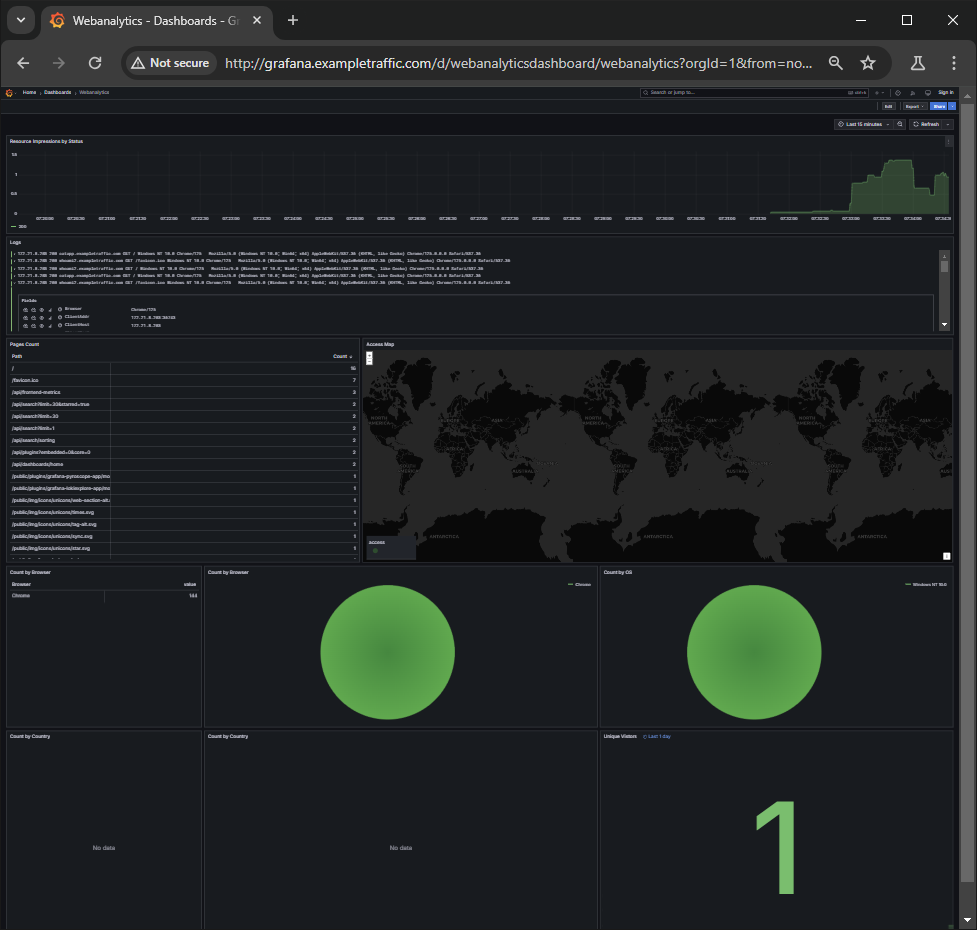
Here is a more zoomed out version of the Dashboard displaying more of the elements available.
What? That was a lot. I just want this to work!!
Why didnt you choose to use the script? Are you not sure about some of the required software that it will install and system state assumptions?
Dont worry!
I took the steps above and converted them to a graphic, now they’re the script breakdown below:
Script Breakdown
1
2
3
4
5
6
7
8
9
10
11
12
13
14
15
16
17
18
19
20
21
22
23
24
25
26
27
28
29
30
31
32
33
34
35
36
37
38
39
40
41
42
43
44
45
46
47
48
49
50
51
52
53
54
55
56
57
58
59
60
61
62
63
64
65
66
67
68
69
70
71
72
73
74
75
76
77
78
79
80
+----------------------------------------------------+
|                  Script Execution Start            |
+----------------------------------------------------+
                            |
                            v
+---------------------+     |     +-------------------+
|  Display Banner     |-----+---->| Check Prerequisites|
|  - Initial warnings |           | - Sudo validation  |
+---------------------+           | - Docker checks    |
                                  | - .env loading     |
                                  +-------------------+
+-----------------------------+               |
| Check for Domain Name       |               |
| - Prompt if not in .env     |<--------------+
+-----------------------------+
                            |
                            v
+----------------------------------------------------+
| Gather Network Information                         |
| - IP, gateway, interface, subnet detection         |
+----------------------------------------------------+
                            |
                            v
+----------------------------------------------------+
| Check/Create/Modify Systemd Network Files          |
| - Create macvlan netdev file                       |
| - Modify for existing interface rename             |
+----------------------------------------------------+
                            |
                            v
+------------------+        +------------------+
| Pre-Reboot Path  |        | Post-Reboot Path |
| - virt-check     |        | - Get new iface  |
| - Create network |        +------------------+
| - Rename prompt  |                  |
+------------------+                  |
          |                           |
          v                           v
+------------------------------+    +-----------------------------+
| Setup Traefik's MacVLAN IP   |    | Continue to Docker Setup    |
| - Auto MacVLAN IP assignment |    +-----------------------------+
| - No IP match = prompt for 1 |                  |
+------------------------------+                  |
                            |                     |
                            v                     v
+----------------------------------------------------+
| Update .env File                                   |
| - Save all collected variables                     |
+----------------------------------------------------+
                            |
                            v
+----------------------------------------------------+
| Handle Reboot Requirements                         |
| - Check systemd-networkd - not enabled, reboot     |
+----------------------------------------------------+
                            |
                            v
+----------------------------------------------------+
| Docker Network Setup                               |
| - Create traefik_proxy_net & traefik2host networks |
+----------------------------------------------------+
                            |
                            v
+----------------------------------------------------+
| Cleanup & Verification                             |
| - Remove sample files                              |
| - Download required configs                        |
| - Check GeoLite database                           |
+----------------------------------------------------+
                            |
                            v
+----------------------------------------------------+
| Run Docker Compose                                 |
| - Bring up Traefik stack                           |
+----------------------------------------------------+
                            |
                            v
+----------------------------------------------------+
|                     Script Complete                |
+----------------------------------------------------+
Reviews!
Dont listen to me, just read the reviews!
Marcus Holtz has created a guide so obsessively detailed it borders on technical madness. Does the world really need another 8,000-word exposition on Docker networking that dissects every conceivable configuration option? Apparently, it does. What’s infuriating is how Holtz manages to make the impenetrable MacVLAN concept not just understandable but practically deployable, stealing the hours you’ve planned to spend troubleshooting network issues. His step-by-step approach is foolproof, and the automated scripts to deploy an intricate Grafana dashboard works so efficiently they’ll render half your DevOps team redundant. Read at your own risk—your infrastructure might actually start working properly, and you’ll have no one to blame but Holtz.