

Cloudflare’s Email Routing for Generating Unlimited Email Alias with Conditional Rules
Intro
I have been looking at all the ways to generate forwarding addresses. I wanted to create an email address per account, and not use one overlapping email address.
Here are some of the services available already in that category:
Those are great, you can even integrate some into Bitwarden, infact PCWorld has a whole write-up on it.
But I’m afraid of the idea of being locked into a company that may one day disappear, and self-hosting to generate forwarding addresses, just doesnt vibe.
So, I thought - nope, we do this instead:
Now you can just log into your Cloudflare dashboard and edit this script instead of a web UI with buttons.
What This Method Allows For
✅ No vendor lock-in - Just Cloudflare javascript - make changes in the script)
✅ Unlimited aliases - Create or block as many as you want - no need for additional domains
✅ Free - Up to 100k emails/day, and 200 addresses - this is per account and not per domain
✅ Version Control - Backup and export rules - the configuration section is in script header
✅ Multiple Functions - You can create forwarding lists, block spam, and filter emails
This script basically automates the busy work of sorting your emails efficiently on your domain before they reach your inbox, all controlled by easy-to-edit rules.
Steps to Configure Email Forwarding using Alias from Cloudflare’s Email Routing with Conditional Rules
I haven’t gone into email privacy — and yes, that’s a bit ironic for something involving routing with Cloudflare. I do care about privacy and plan to make it a key part of the setup down the line. For now, my main goal is to build a solid, long-term system that runs smoothly and gives me some actual peace of mind.
Here are the steps (with screenshots) needed to get the Cloudflare email worker up and runnnig.
You will need to configure the script before you paste it in, just a heads up.
There is a section after this screen shot configuration of Cloudflare email workers to help you setup the email worker script for your needs.
Step 1. Create a cloudflare account
To create a Cloudflare account:
Go to the Sign up page ↗.
Enter your Email and Password.
Select Create Account.
Once you create your account, Cloudflare will automatically send an email to your address to verify that email address.
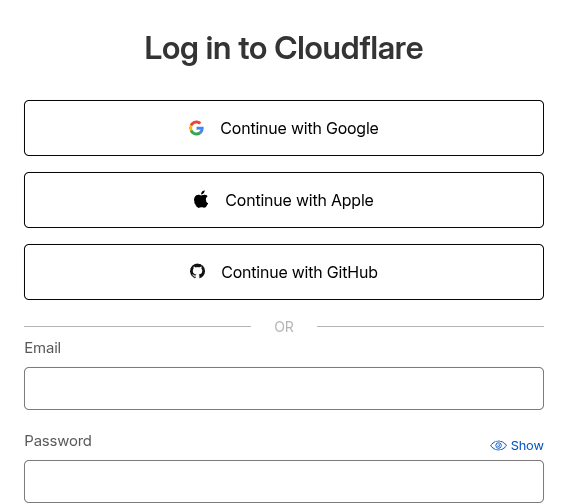 This screenshot demonstrates the Sign up page.
 You are logged in once you see the loading screen
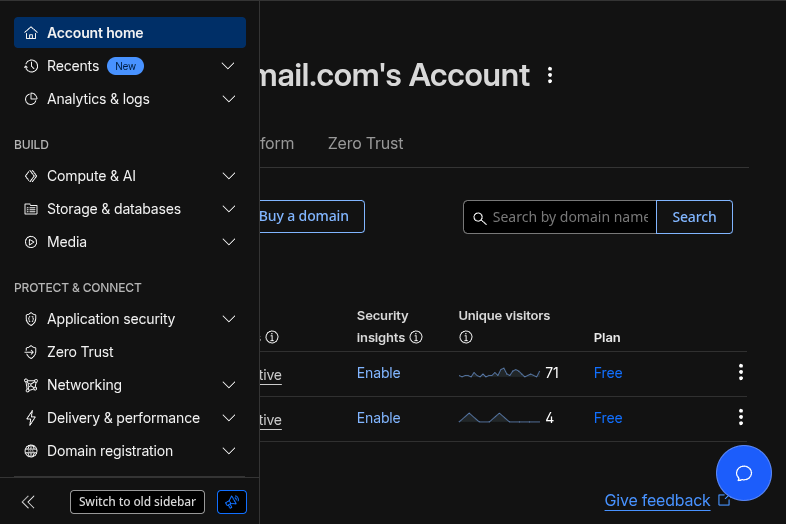 The Dashboard view page, with the menu on the left
Step 2. Bring your domain into Cloudflare: Either with Nameserver change or DNS entries
To use Cloudflare you need to Onboard or Buy a domain:
Click on the appropreate button for your option.
Begin the onboarding process by setting the nameserver.
 The button for Onboarding a domain or Buying a domain
 Instructions to setup the Nameserver with your domain
Step 3. Log into your domain registrar to complete step 2
If you didnt buy your domain with Cloudflare, you may need to login to your registrar to change the nameservers:
Login to your domain’s dashboard
Look for things like: Enter my own Nameservers, Custom DNS, DNS Management, Edit Nameserver
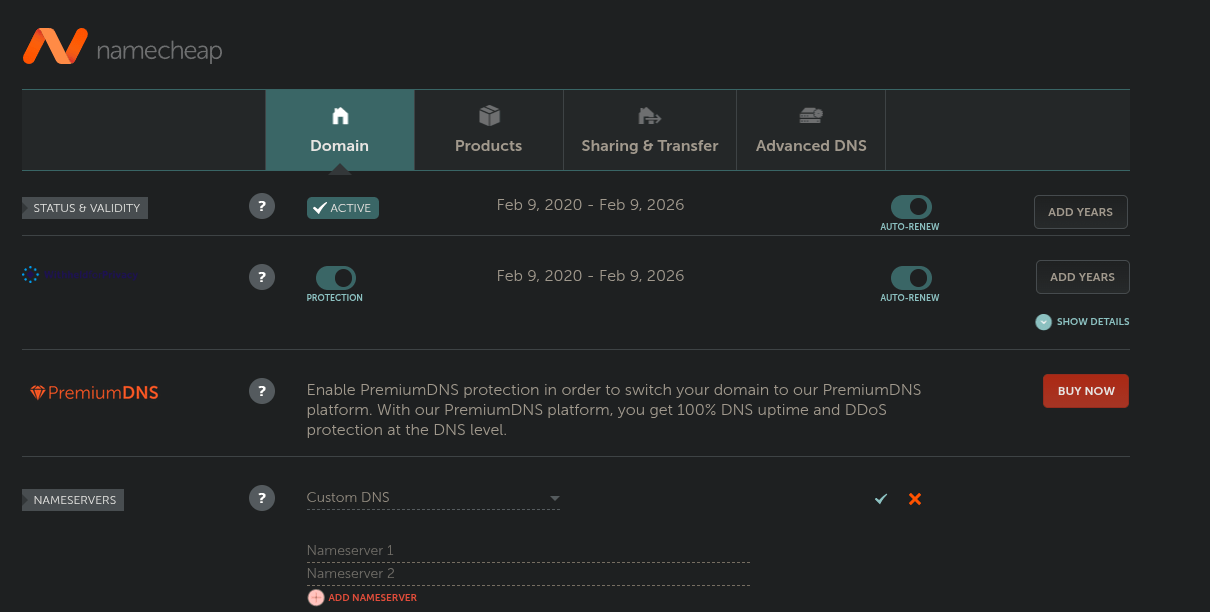 Namecheap example screenshot to Add a Nameserver
Step 4. Go to whereever to have to generate the DNS entries for all the MX and DMARC SPF records
Once Cloudflare emails you to verify your nameserver has propigated (up to 24 hours), you can begin to modify your DNS records:
Cloudflare will check your current records for compatability
You will need to add MX and TXT records for Cloudflare’s Email services (this is available as a guided wizard)
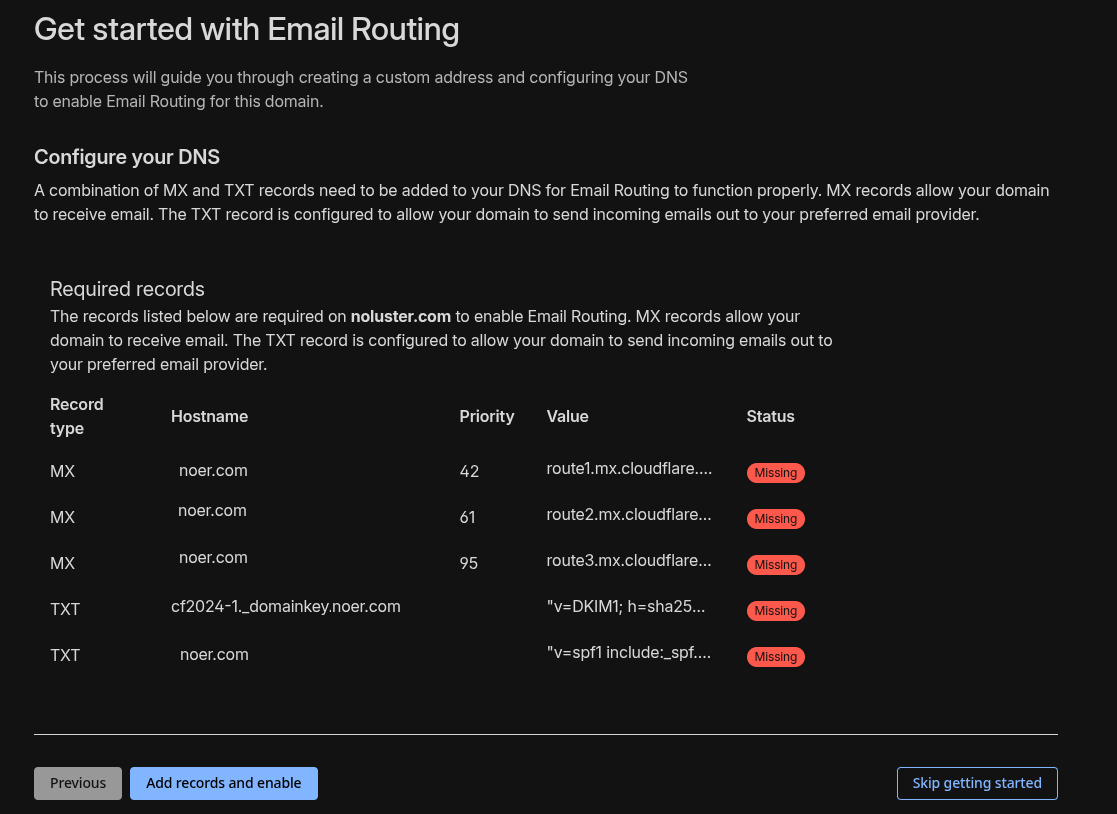 The guided wizard that imports your DNS records to Cloudflare
Step 5. Login to cloudflare’s dashboard (we’ll be refering to the “new sidebar” when referencing the menu)
After you’ve got your DNS setup, you can begin to setup Cloudflare Email Routing:
- Use the menu on the left to locate the
Email>Email Routingpage
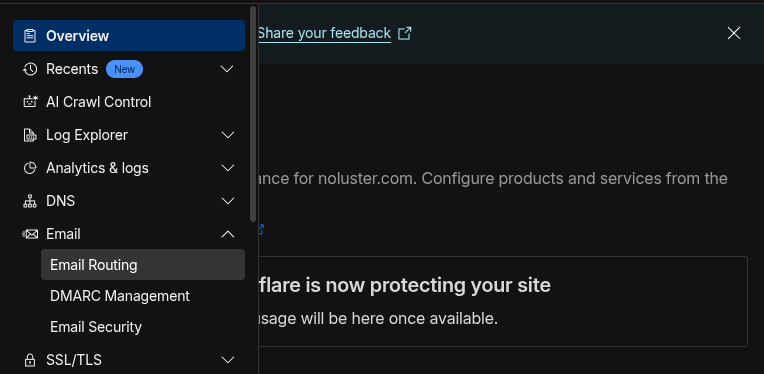 The menu on the left highlighting the Email Routing page
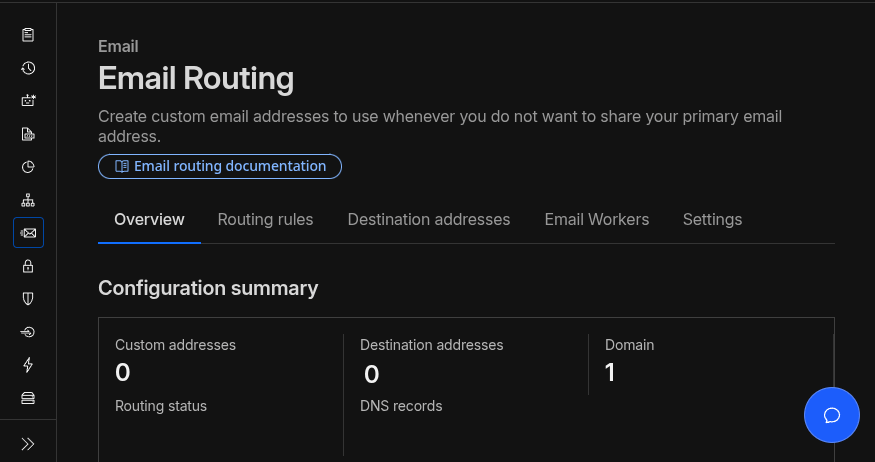 The Email Routing page overview tab
Step 6. email/routing/destination-address
Generate a destination address for any address you’re thinking about forwarding to (Gmail accounts):
Click on
Add destination addressAdd your email as a Verified Destination
Click Send verification email
Check your inbox and click the verification link
Wait for it to show as “Verified” in Cloudflare
 The Destination address tab on the Email Routing page
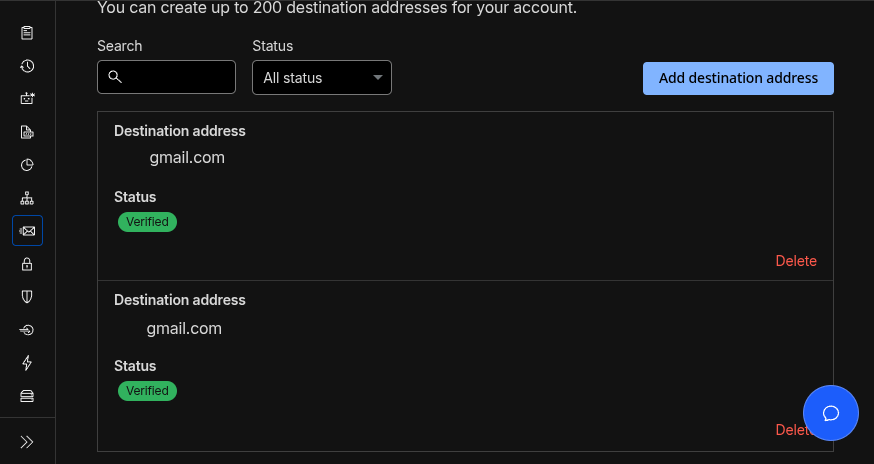 Placeholder Destination addresses that have been properly verified
Step 7. /email/routing/workers
This is the last step before having to edit a script, to paste into our worker.
You will need to be sure you have correctly changed the sections of the script to fit your addresses and needs before adding them:
You can find the area required to edit this script down below
If you’re ready to create an email worker, click
CreateName it and select
Create my own
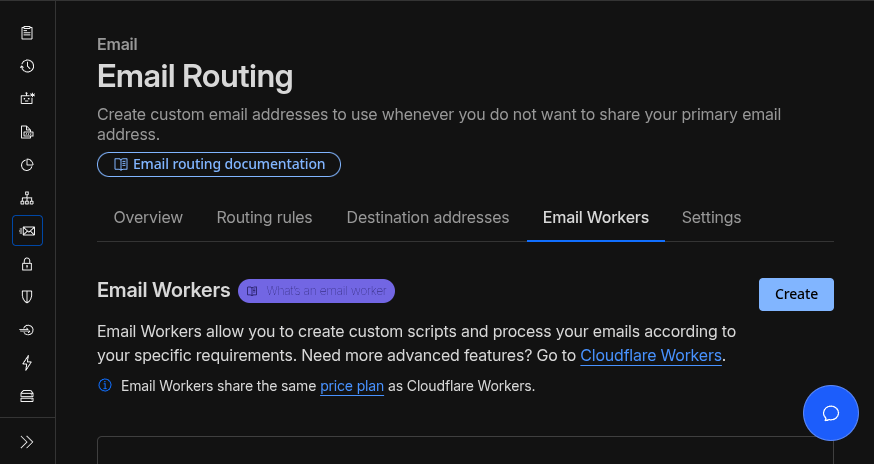 The Email Workers tab on the Email Routing page
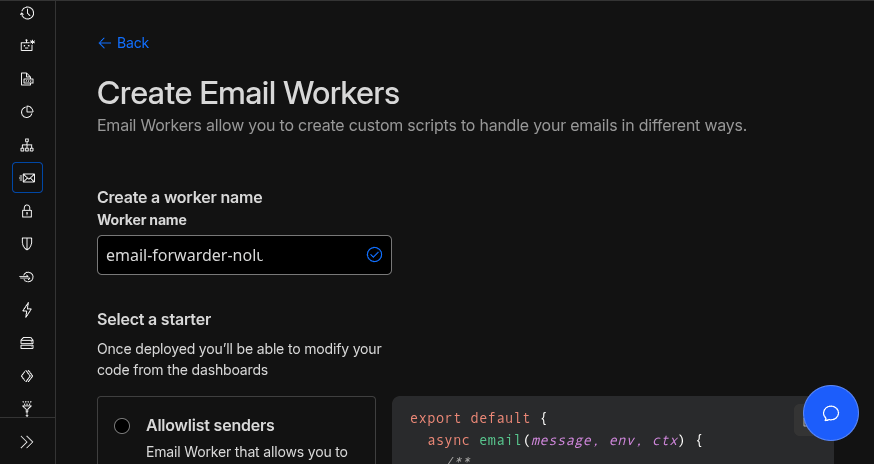 Creating an Email Worker
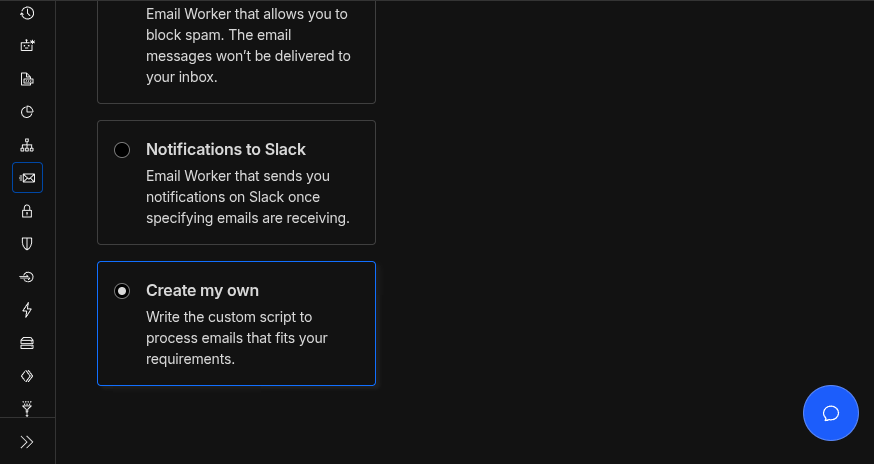 The Create my own option, allowing for custom javascript code
Step 8. /workers/services/edit/email-worker-1/production
Again, second warning - make sure you have edited the config section of the script before pasting it in
You will need to be sure you have correctly changed the sections of the script to fit your addresses and needs before adding them:
Replace any placeholder email addresses with correct addresses
You can find more more information in the area required to edit this script down below
When the script is ready, open the
Code editorfrom the Worker you madeErase any code there already and paste in your modified script
- Hit the Deploy button to send into action
 Replacing the placeholder address with my real Gmail address
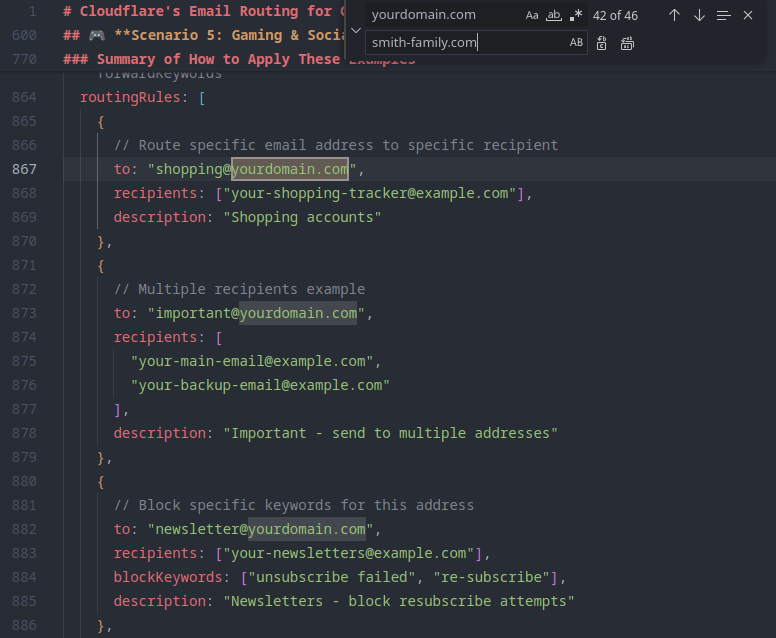 Replacing the placeholder domain with the Onboarded Cloudflare domain, smith-family.com
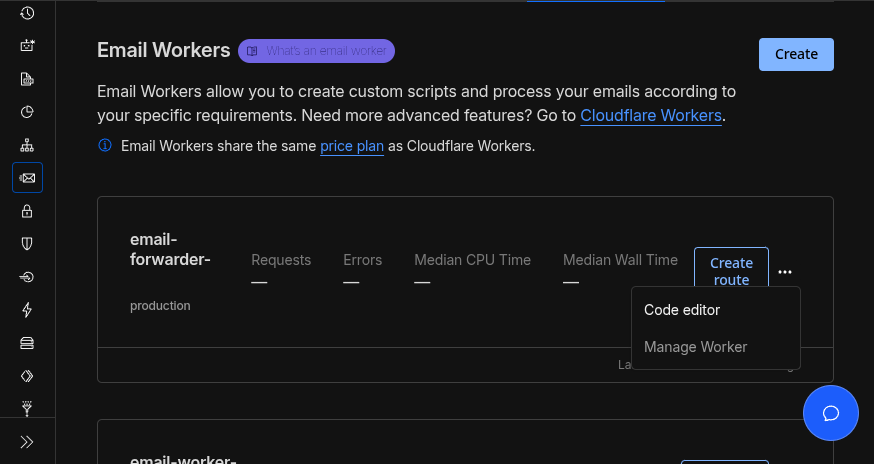 Back at the Email Routing page, under the Email Workers tab, and a recently created Worker
 The default empty worker.js template
 The pasted in modified script ready to work
Step 9. email/routing/routes
You need to have a catch all that will forward to your email worker. (DONT click “create route” on your email-worker):
On the Email Routing page, under Routing Rules
The Catch-all address area needs to be turned on and edited
On the Edit catch-all address page, select
Send to a Workerand select your Worker you madeSave
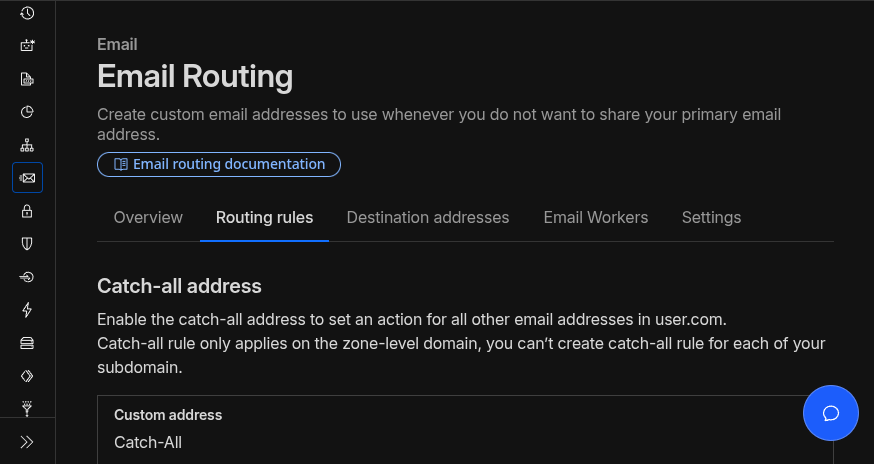 Routing Rules tab on the Email Routing page with Catch-all addresses
 Adding a catch-all address to work with the Email Worker
Step 10. /email/routing/overview
With the tasks complete, you can go back to the overview page to see some changes:
You should see your destination addresses you made
Scrolling down you can find Email Routing Summary
Activity of any emails sent or recieved
So go send a test email
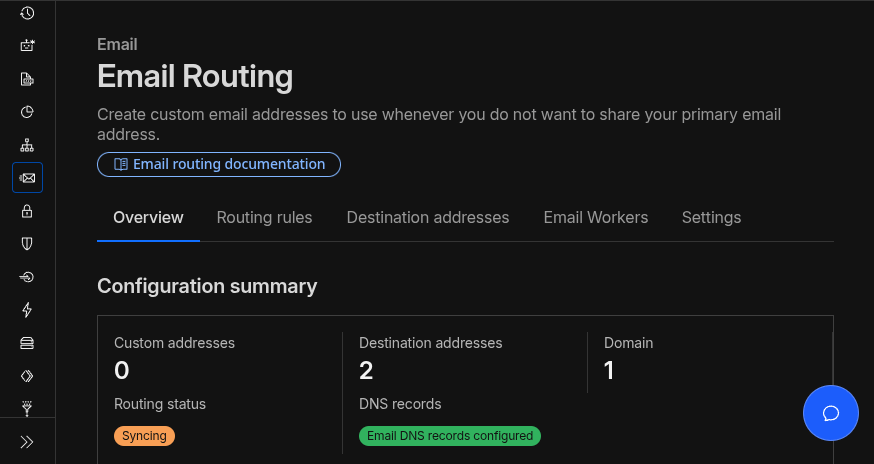 Overview of the Email Routing section
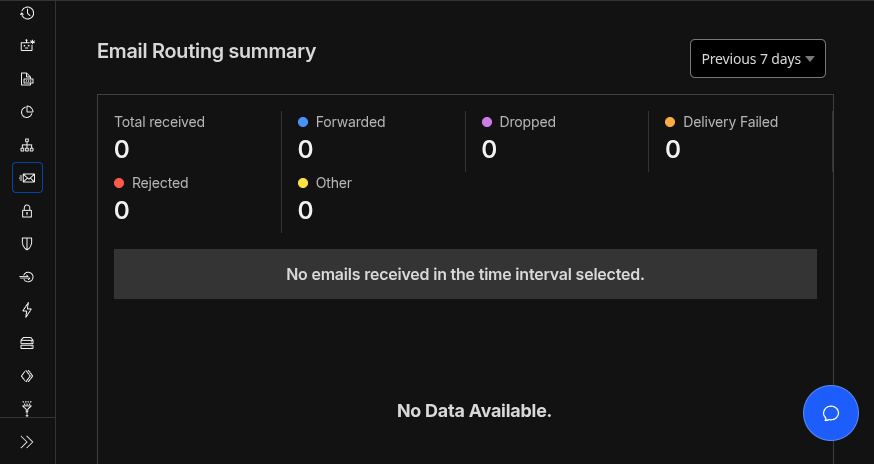 Email Routing summary section of the last 7 days
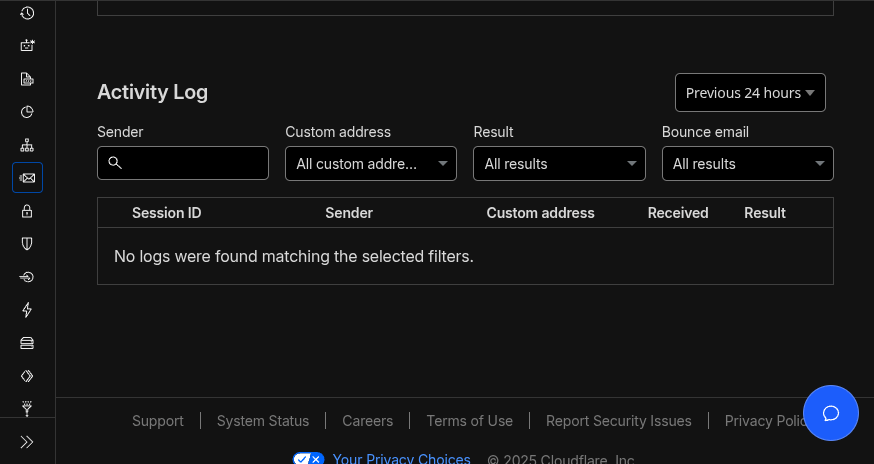 The Email Routing Activity Log on the Overview Tab
Step 11. /workers/services/view/email-worker-1/production/observability/logs?workers-observability-view=invocations
Now that you sent a test email, did it work?
Enable Worker Logs
Read your Logs
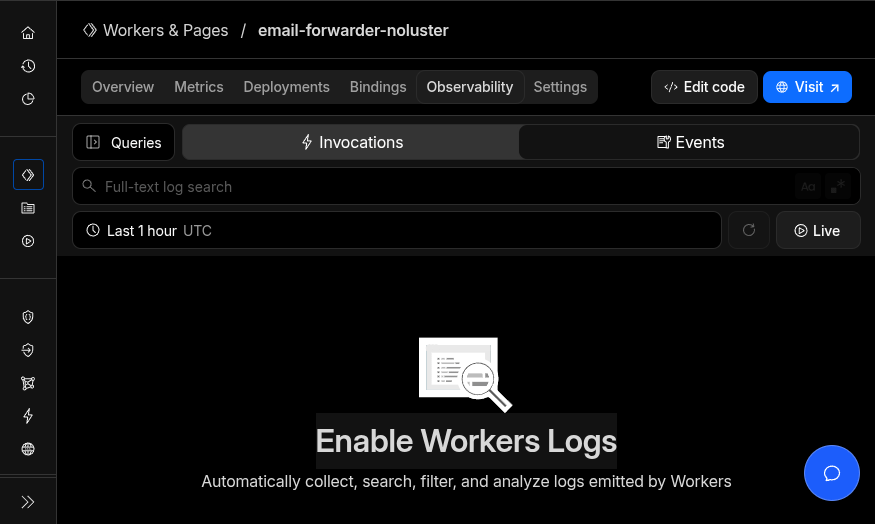 Worker Services Page under the Worker created in the Observability tab
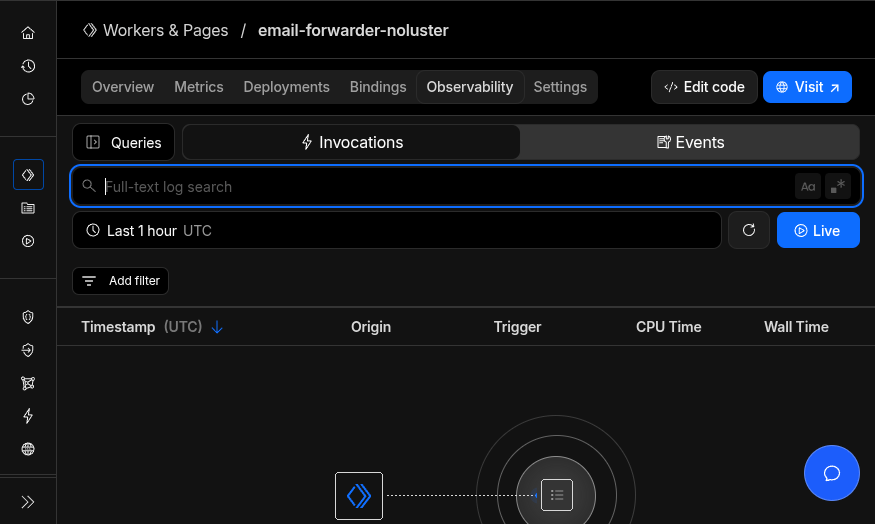 Observability working and ingesting worker logs that will appear here
CONGRATS!
Now you should be all setup to use email alias with Cloudflare Email Routing.
If it didnt work…
- Help is here
- Help is here
Basic Configuration Examples
Here’s the section that helps explain what you need to edit.
Summary of How to Apply These Examples
To make changes, add or modify entries in the
routingRulesarray.Use the
tofield to target incoming specific recipient email addresses.Use the
fromfield to filter based on sender email or domain.Use the
recipientsarray to specify where emails should be forwarded (your Cloudflare verified destination addresses).Use
block,blockKeywords, orforwardKeywordsto control which emails get rejected, forwarded, or ignored.Each rule should have a friendly
descriptionfor clarity in your logs.Deploy this updated script as a Cloudflare Email Worker bound to your domain email routes.
Monitor logs to check routing success and troubleshoot.
Example 1. Email to Email Forwarding
Here you can send an email coming to amazon@yourdomain.com into another recipient’s inbox, your-email@gmail.com.
And to stop getting emails from amazon@yourdomain.com - just remove what you added.
1
2
3
4
5
{
  to: "amazon@yourdomain.com",
  recipients: ["your-email@gmail.com"],
  description: "Amazon account"
}
Example 2. Block Specific Keywords
Lets say you wanted a better method to filter your messages, you can block phrases or keywords in the subject line.
In this example, your email you use to sign up to social media accounts, social@yourdomain.com, normally forwards to your personal email at, our-email@gmail.com, but you’re getting too many messages from social media and there’s no way to turn them off. Well, now you can selectivly stop those “follow back xxyy” and “xxyy liked aabb” emails by adding them to the blockedKeywords.
1
2
3
4
5
6
{
  to: "social@yourdomain.com",
  recipients: ["your-email@gmail.com"],
  blockKeywords: ["follow back", "liked"],
  description: "Social media"
}
Or how about using a specific email just for your Playstation account? No need to worry about store spam anymore!
1
2
3
4
5
6
  {
    to: "playstation@yourdomain.com",
    recipients: ["your-email@gmail.com"],
    blockKeywords: ["playstation store", "sale", "offer"],
    description: "PlayStation - no store spam"
  }
Example 3. Forward Only On Keyword Match
Instead of just blocking a few phrases, you can block every phrase!
Allow only selective keywords or phrases that match to be allowed to be delivered.
1
2
3
4
5
6
  {
    to: "steam@yourdomain.com",
    recipients: ["your-email@gmail.com"],
    forwardKeywords: ["security", "login", "password", "purchase"],
    description: "Steam - security and purchases only"
  }
Example 4. Spam Trap Junk Address
Then, there’s the option of blocking everything.
Use the example email, spamtrap@yourdomain.com, when forced to give email to sketchy sites - it gets sinkholed.
Any emails sent to your spam trap address (spamtrap@yourdomain.com) are automatically blocked.
1
2
3
4
5
{
  to: "spamtrap@yourdomain.com",
  block: true,
  description: "Block all spam trap emails"
}
Example 5. Family Priority Inbox
This example lets us recieve email but only from a specific domain. In this example, it’s the family’s domain.
We can create a rule that only accepts certain allowed senders for familymessages@yourdomain.com. Emails from close family or friends - sending email from the domain trustedfamily.com - will be allowed to arrive on that inbox, and any other sources, like gmail, will be blocked.
1
2
3
4
5
6
{
  to: "familymessages@yourdomain.com",
  from: "@trustedfamily.com",  // only emails from this domain forwarded
  recipients: ["your-email@gmail.com"],
  description: "Family emails"
}
More Configuration Examples Below
There are a lot of different ways you can use this script, so I wanted to include more examples.
Skip to those if you want to learn more.
How to Edit the Config
I wanted to be sure to give some reference to what is going on, and what everything in the configuration examples mean before we continue.
Understanding the Symbols used in Javascript
{ }= A container that holds related information[ ]= A list of items" "= Text (always needs quotes around it),= Separates items in a list (like “and” between items)//= A comment/note that the computer ignores
Editing Your Settings
Step 1. Change the Default Email Address
Find the line:
1
defaultRecipient: "your-email@gmail.com",
Change it to YOUR email:
1
defaultRecipient: "john.smith@gmail.com",
Keep the quotes
" "Keep the comma at the end
,Just replace the text inside the quotes
Step 2. Keywords to Block in Every Email Ever
Find this section:
1
2
3
4
globalBlockKeywords: [
  "viagra", "casino", "lottery", "prince nigeria",
  "bitcoin mining", "make money fast"
],
Add/remove/change/ keywords:
1
2
3
4
5
6
globalBlockKeywords: [
  "pair it up",
  "brand-new iphone",
  "crypto giveaway",
  "click here now"
],
Each keyword in quotes
" "Comma after each one
,EXCEPT the lastKeywords are NOT case-sensitive (“VIAGRA” = “viagra”)
Step 3. Create an Email Routing Rule
Find the routingRules: section. Let’s break down what the routingRules look like:
1
2
3
4
5
6
routingRules: [
  {
    to: "shopping@yourdomain.com",
    recipients: ["your-email@gmail.com"],
    description: "Shopping accounts"
  },
In the example above:
1
2
3
4
5
{
  to: "amazon@mydomain.com",                    ← Email address people send TO
  recipients: ["john.smith@gmail.com"],         ← YOUR real email (where it forwards)
  description: "Amazon account"                 ← Note to yourself (optional)
},                                              ← Comma ONLY if there's another rule below
Step 4. Adding Multiple Rules
Let’s say you want to set up 3 email addresses. Here’s how:
1
2
3
4
5
6
7
8
9
10
11
12
13
14
15
16
17
routingRules: [
  {
    to: "amazon@mydomain.com",
    recipients: ["john.smith@gmail.com"],
    description: "Amazon purchases"
  },
  {
    to: "netflix@mydomain.com",
    recipients: ["john.smith@gmail.com"],
    description: "Netflix account"
  },
  {
    to: "bank@mydomain.com",
    recipients: ["john.smith@gmail.com", "jane.smith@gmail.com"],
    description: "Bank alerts - sent to both of us"
  }
]
Notice:
First two rules have commas
,after the}because another rule followsLast rule has NO comma after
}because it’s the last oneEach rule is wrapped in
{ }(curly brackets)All rules are inside
[ ](square brackets)
Common Gotchas and What to Look For
Just reviewing everything discussed, incase your config doesnt work come here.
Mistake 1: Commas Go Between Items, and NOT After the Last One
1
2
3
4
5
6
// ❌ WRONG - comma after last item causes errors
recipients: [
  "email1@gmail.com",
  "email2@gmail.com",
  "email3@gmail.com",  ← Remove this comma!
]
1
2
3
4
5
6
// ✅ CORRECT - comma between items, none after last
recipients: [
  "email1@gmail.com",
  "email2@gmail.com",
  "email3@gmail.com"
]
Mistake 2: Missing Quotes
1
2
// ❌ WRONG - no quotes
recipients: [john@gmail.com]
1
2
// ✅ FIXED - quotes around the text
recipients: ["john@gmail.com"]
Mistake 3: Commas Also in routingRules
Not just when listing between brackets [] do you need to be careful of commas , but also when listing between each routing rule { }
1
2
3
4
5
6
7
8
// ❌ WRONG - comma after last item causes errors
routingRules: [
  {
    to: "test@mydomain.com",
    recipients: ["john@gmail.com"],
    description: "Test"
  },  ← Remove this comma! (it's the last rule)
]
1
2
3
4
5
6
7
8
// ✅ FIXED - No comma on last rule
routingRules: [
  {
    to: "test@mydomain.com",
    recipients: ["john@gmail.com"],
    description: "Test"
  }
]
Mistake 4: Forgetting to Replace “example.com”
1
2
// ❌ WRONG - You need to change "yourdomain.com"
to: "amazon@yourdomain.com",
1
2
// ✅ FIXED - Using YOUR actual domain
to: "amazon@smith-family.com",
Quick Checklist Before Running
✅ Changed defaultRecipient to your real email?
✅ All emails in quotes " "?
✅ Commas between items, but NOT after the last one?
✅ Replaced @yourdomain.com with your actual domain?
✅ All recipient emails are verified in Cloudflare?
More Configuration with Scenario Based Examples
Here are some real-world scenarios that demonstrate the power of this setup. I’ll show you exactly what to modify in the CONFIG section for each use case.
Scenario 1: Online Shopping Accounts
Goal: Create unique email addresses for each retailer so you can:
Track which companies sell your data (spam sources)
Organize receipts automatically
Block promotional emails from specific stores
1
2
3
4
5
6
7
8
9
10
11
12
13
14
15
16
17
18
19
20
21
22
23
24
routingRules: [
  {
    to: "amazon@yourdomain.com",
    recipients: ["receipts@gmail.com"],
    blockKeywords: ["prime day", "deal of the day", "limited time"],
    description: "Amazon - receipts only, no promos"
  },
  {
    to: "target@yourdomain.com",
    recipients: ["receipts@gmail.com"],
    description: "Target purchases"
  },
  {
    to: "bestbuy@yourdomain.com",
    recipients: ["receipts@gmail.com", "tech-alerts@gmail.com"],
    forwardKeywords: ["shipped", "delivered", "order"],
    description: "Best Buy - only order updates to both emails"
  },
  {
    to: "shopping-test@yourdomain.com",
    recipients: ["junk@gmail.com"],
    description: "Test new stores here first"
  }
]
Real-world logic:
Sign up at Amazon with
amazon@yourdomain.comAll order confirmations go to your receipts folder
Promotional emails with “Prime Day” get blocked automatically
If Amazon sells your email and you get spam, you know exactly who leaked it
You can block
amazon@yourdomain.comentirely without affecting other accounts
Scenario 2: Financial Account Separation
Goal: Keep banking, investments, and crypto separate with different security levels
1
2
3
4
5
6
7
8
9
10
11
12
13
14
15
16
17
18
19
20
21
22
23
24
25
26
27
28
29
routingRules: [
  {
    to: "chase@yourdomain.com",
    recipients: ["main@gmail.com", "important@gmail.com"],
    forwardKeywords: ["security", "alert", "unusual", "login", "password"],
    description: "Chase bank - urgent alerts to phone & email"
  },
  {
    to: "chase-statements@yourdomain.com",
    recipients: ["statements@gmail.com"],
    description: "Chase - monthly statements only"
  },
  {
    to: "vanguard@yourdomain.com",
    recipients: ["investments@gmail.com"],
    blockKeywords: ["webinar", "market update", "newsletter"],
    description: "Vanguard - trades only, no marketing"
  },
  {
    to: "coinbase@yourdomain.com",
    recipients: ["crypto@protonmail.com"],
    description: "Crypto on separate secure email"
  },
  {
    from: "@irs.gov",
    recipients: ["main@gmail.com", "spouse@gmail.com"],
    description: "IRS emails to both of us"
  }
]
Real-world logic:
Only the security alerts from Chase go to your important address
You use different addresses for login vs. statements (phishing protection)
Investment newsletters get blocked but trade confirmations come through
Crypto stays on a completely separate email provider (extra security layer)
Tax-related emails automatically CC your spouse
Scenario 3: Smart Home & Family Management
Goal: Handle newsletters, school communications, smart home alerts, and shared family accounts
1
2
3
4
5
6
7
8
9
10
11
12
13
14
15
16
17
18
19
20
21
22
23
24
25
26
27
28
29
30
31
32
33
34
35
routingRules: [
  {
    to: "school@yourdomain.com",
    recipients: ["parent1@gmail.com", "parent2@gmail.com"],
    forwardKeywords: ["urgent", "emergency", "sick", "incident", "pickup"],
    description: "School - urgent messages to both parents"
  },
  {
    to: "school-newsletter@yourdomain.com",
    recipients: ["family-archive@gmail.com"],
    description: "School newsletters - low priority"
  },
  {
    to: "ring@yourdomain.com",
    recipients: ["parent1@gmail.com"],
    forwardKeywords: ["motion", "doorbell"],
    description: "Ring doorbell alerts"
  },
  {
    to: "nest@yourdomain.com",
    recipients: ["parent1@gmail.com"],
    forwardKeywords: ["smoke", "carbon", "alert"],
    description: "Nest - safety alerts only"
  },
  {
    to: "newsletters@yourdomain.com",
    recipients: ["reading@gmail.com"],
    description: "Substack, Medium, etc."
  },
  {
    to: "spam-trap@yourdomain.com",
    block: true,
    description: "Use this when forced to give email to sketchy sites"
  }
]
Real-world logic:
School emergency emails go to both parents immediately
Regular newsletters go to archive (read when you have time)
Smart home devices only alert on actual events (not app updates)
You can give
spam-trap@yourdomain.comto random sign-up forms that require email
Scenario 4: Gaming & Social Media Isolation
Goal: Keep gaming, social media, and entertainment separate from important accounts
1
2
3
4
5
6
7
8
9
10
11
12
13
14
15
16
17
18
19
20
21
22
23
24
25
26
27
28
29
30
31
32
33
34
35
36
37
routingRules: [
  {
    to: "steam@yourdomain.com",
    recipients: ["gaming@gmail.com"],
    forwardKeywords: ["security", "login", "password", "purchase"],
    description: "Steam - security and purchases only"
  },
  {
    to: "playstation@yourdomain.com",
    recipients: ["gaming@gmail.com"],
    blockKeywords: ["playstation store", "sale", "offer"],
    description: "PlayStation - no store spam"
  },
  {
    to: "twitter@yourdomain.com",
    recipients: ["social@gmail.com"],
    forwardKeywords: ["mentioned you", "direct message"],
    description: "Twitter - only interactions"
  },
  {
    to: "facebook@yourdomain.com",
    recipients: ["social@gmail.com"],
    blockKeywords: ["suggested", "friend request", "you may know"],
    description: "Facebook - block noise"
  },
  {
    to: "netflix@yourdomain.com",
    recipients: ["entertainment@gmail.com"],
    description: "Netflix account"
  },
  {
    to: "spotify@yourdomain.com",
    recipients: ["entertainment@gmail.com"],
    blockKeywords: ["premium", "upgrade", "offer"],
    description: "Spotify - no upsells"
  }
]
Real-world logic:
Gaming platforms generate tons of promotional emails—block them at source
Social media only notifies you of direct interactions
Streaming services separated from important email
If your gaming email gets compromised, no access to banking/critical accounts
The Script That Needs Edited
Here is the code to place in your Email Routing Worker you created, be sure to edit the configuration section first before you deploy it.
1
2
3
4
5
6
7
8
9
10
11
12
13
14
15
16
17
18
19
20
21
22
23
24
25
26
27
28
29
30
31
32
33
34
35
36
37
38
39
40
41
42
43
44
45
46
47
48
49
50
51
52
53
54
55
56
57
58
59
60
61
62
63
64
65
66
67
68
69
70
71
72
73
74
75
76
77
78
79
80
81
82
83
84
85
86
87
88
89
90
91
92
93
94
95
96
97
98
99
100
101
102
103
104
105
106
107
108
109
110
111
112
113
114
115
116
117
118
119
120
121
122
123
124
125
126
127
128
129
130
131
132
133
134
135
136
137
138
139
140
141
142
143
144
145
146
147
148
149
150
151
152
153
154
155
156
157
158
159
160
161
162
163
164
165
166
167
168
169
170
171
172
173
174
175
176
177
178
179
180
181
182
183
184
185
186
187
188
189
190
191
192
193
194
195
196
197
198
199
200
201
202
203
204
205
206
207
208
209
210
211
212
213
214
215
216
217
218
219
220
221
222
223
224
225
226
227
228
229
230
231
232
233
234
235
236
237
238
239
240
241
242
243
244
245
246
247
248
249
250
251
252
253
254
255
256
257
258
259
260
261
262
263
264
265
266
267
268
269
270
271
272
273
274
275
276
277
278
279
280
281
282
283
284
285
286
287
288
289
290
291
292
293
294
295
296
297
// ============================================
// CONFIGURATION SECTION - EDIT THIS PART
// ============================================

const CONFIG = {
  // Default forwarding address (fallback)
  // CHANGE THIS TO YOUR REAL EMAIL ADDRESS
  defaultRecipient: "your-main-email@example.com",

  // Enable/disable logging to console (visible in Cloudflare dashboard)
  enableLogging: true,

  // Log every email (true) or only blocked/errors (false)
  logAllEmails: true,

  // Global subject keywords that will BLOCK emails
  globalBlockKeywords: [
    "crypto giveaway", "win a free car", "prince nigeria", "you could have already won", "dont think make money fast"
  ],

  // Rules are checked in order; first match wins.
  //
  // Gmail plus tags (e.g. yourname+shopping@gmail.com) are supported.
  // Gmail delivers plus-tagged addresses to the base inbox, and
  // you can then filter on `to:yourname+shopping@gmail.com` in Gmail.
  //
  // IMPORTANT: Every address listed in `recipients` must be individually
  // verified as a Destination Address in the Cloudflare Email Routing
  // dashboard before the worker can forward to it.
  // This includes plus-tagged variants — each one must be verified separately!
  // See: https://developers.cloudflare.com/email-routing/setup/email-routing-addresses/

  routingRules: [
    {
      // Route specific email address to specific recipient
      to: "shopping@yourdomain.com",
      recipients: ["your-shopping-email@example.com"],
      description: "Shopping accounts"
    },
    {
      // Multiple inbound aliases, share one recipient and rule
      to: [
        "pandanewsletter1@yourdomain.com",
        "pandsanewsletter2@yourdomain.com"
      ],
      recipients: ["yourname+pandatuff@example.com"],
      description: "Shopping accounts"
    },
    {
      // Multiple recipients sent the same email
      to: "important@yourdomain.com",
      recipients: [
        "yourname+important@example.com",
        "yourbackup+important@example.com"
      ],
      description: "Important - send to multiple tagged inboxes"
    },
    {
      // Block specific keywords for this address
      to: "newsletter@yourdomain.com",
      recipients: ["yourname+newsletter@example.com"],
      blockKeywords: ["unsubscribe failed", "re-subscribe"],
      description: "Newsletters - block resubscribe attempts"
    },
    {
      // Forward only if subject contains specific keywords
      to: "school@yourdomain.com",
      recipients: [
        "parent1+school@example.com",
        "parent2+school@example.com"
      ],
      forwardKeywords: ["urgent", "emergency", "sick", "incident", "pickup"],
      description: "School - urgent messages to both parents"
    },
    {
      // Block all emails to this address
      to: "spam-trap@yourdomain.com",
      block: true,
      description: "Spam trap - block everything"
    }
  ]
};
//
// To find more routingRule examples:
// https://blog.holtzweb.com/posts/unlimited-email-forwarding-address-aliases-using-cloudflare/#more-configuration-with-scenario-based-examples
//
// ============================================
// EMAIL WORKER CODE - NO NEED TO EDIT BELOW
// ============================================

export default {
  async email(message, env, ctx) {
    const startTime = Date.now();

    try {
      // Extract email details with fallbacks.
      // message.to is always a string (SMTP envelope RCPT TO)
      const from = message.from || "unknown@sender.com";
      const to = message.to || "";
      const subject = message.headers.get("subject") || "(no subject)";

      // Validate we have required fields
      if (!to) {
        console.error("Missing 'to' address in email");
        message.setReject("Missing recipient address");
        return;
      }

      // Log incoming email
      if (CONFIG.enableLogging && CONFIG.logAllEmails) {
        console.log(`[${new Date().toISOString()}] Incoming email:`, {
          from,
          to,
          subject,
          size: message.rawSize
        });
      }

      // Check global block keywords in subject
      const subjectLower = subject.toLowerCase();
      for (const keyword of CONFIG.globalBlockKeywords) {
        if (subjectLower.includes(keyword.toLowerCase())) {
          logAction("BLOCKED", "Global keyword match", {
            from, to, subject, keyword
          });
          message.setReject(`Blocked by keyword filter: ${keyword}`);
          return;
        }
      }

      // Find matching routing rule
      const matchedRule = findMatchingRule(message, from, to, subject);

      if (!matchedRule) {
        // No rule matched, use default recipient
        logAction("FORWARDED", "Default routing", {
          from, to, subject,
          recipients: [CONFIG.defaultRecipient]
        });
        await message.forward(CONFIG.defaultRecipient);
        return;
      }

      // Check if rule blocks this email
      if (matchedRule.block) {
        logAction("BLOCKED", `Rule: ${matchedRule.description}`, {
          from, to, subject
        });
        message.setReject("Blocked by routing rule");
        return;
      }

      // Check rule-specific block keywords
      if (matchedRule.blockKeywords) {
        for (const keyword of matchedRule.blockKeywords) {
          if (subjectLower.includes(keyword.toLowerCase())) {
            logAction("BLOCKED", `Keyword in rule: ${matchedRule.description}`, {
              from, to, subject, keyword
            });
            message.setReject(`Blocked by rule keyword: ${keyword}`);
            return;
          }
        }
      }

      // Check rule-specific forward keywords (only forward if keyword present)
      if (matchedRule.forwardKeywords && matchedRule.forwardKeywords.length > 0) {
        let hasKeyword = false;
        for (const keyword of matchedRule.forwardKeywords) {
          if (subjectLower.includes(keyword.toLowerCase())) {
            hasKeyword = true;
            break;
          }
        }

        if (!hasKeyword) {
          logAction("DROPPED", `No forward keyword match: ${matchedRule.description}`, {
            from, to, subject,
            requiredKeywords: matchedRule.forwardKeywords
          });
          message.setReject("Does not match forward keyword criteria");
          return;
        }
      }

      // Forward to recipient(s)
      const recipients = matchedRule.recipients || [CONFIG.defaultRecipient];

      // Validate recipients
      if (!recipients || recipients.length === 0) {
        console.error("No valid recipients found");
        message.setReject("No recipients configured");
        return;
      }

      logAction("FORWARDED", `Rule: ${matchedRule.description}`, {
        from, to, subject, recipients
      });

      // Cloudflare requires one forward() call per address (string only)
      for (const recipient of recipients) {
        if (!recipient || !recipient.includes("@")) {
          console.error(`Invalid recipient address: ${recipient}`);
          continue;
        }
        await message.forward(recipient);
      }

      const processingTime = Date.now() - startTime;
      if (CONFIG.enableLogging) {
        console.log(`Processing completed in ${processingTime}ms`);
      }

    } catch (error) {
      // Log errors
      console.error(`[${new Date().toISOString()}] ERROR:`, {
        error: error.message,
        stack: error.stack,
        from: message.from,
        to: message.to
      });

      // Reject the message on error (prevents silent failures)
      message.setReject("Internal processing error");
    }
  }
};

// ============================================
// MATCHING FUNCTION
//
// rule.to may be a string or an array of strings.
// All address comparisons are case-insensitive.
// message.to (and therefore the `to` parameter here) is always a string —
// it is the SMTP envelope RCPT TO value from the Cloudflare runtime.
// ============================================

function findMatchingRule(message, from, to, subject) {
  const subjectLower = subject.toLowerCase();
  const toLower = to.toLowerCase();
  const fromLower = from.toLowerCase();

  for (const rule of CONFIG.routingRules) {
    let matches = true;

    // Check 'to' field — supports a single string or an array of strings
    if (rule.to) {
      if (Array.isArray(rule.to)) {
        if (!rule.to.map(addr => addr.toLowerCase()).includes(toLower)) {
          matches = false;
        }
      } else {
        if (toLower !== rule.to.toLowerCase()) {
          matches = false;
        }
      }
    }

    // Check 'from' field (can be partial match with @domain.com)
    if (rule.from) {
      if (rule.from.startsWith("@")) {
        // Domain match
        if (!fromLower.endsWith(rule.from.toLowerCase())) {
          matches = false;
        }
      } else {
        // Exact match
        if (fromLower !== rule.from.toLowerCase()) {
          matches = false;
        }
      }
    }

    // Check 'subject' field (partial match)
    if (rule.subject) {
      if (!subjectLower.includes(rule.subject.toLowerCase())) {
        matches = false;
      }
    }

    if (matches) {
      return rule;
    }
  }

  return null;
}

// Helper function for consistent logging
function logAction(action, reason, details) {
  if (!CONFIG.enableLogging) return;

  // Always log blocks and errors, optionally log forwards
  if (action === "BLOCKED" || action === "ERROR" || CONFIG.logAllEmails) {
    console.log(`[${new Date().toISOString()}] ${action}: ${reason}`, details);
  }
}